Where do you find the best items, relics and artifacts in Pathfinder: Kingmaker? Plan your party with this guide.
In this article we tell you
- Which are the best magical and unique items and where to find them
- Which relics or artifacts can be found
- Where you can find the relic fragments
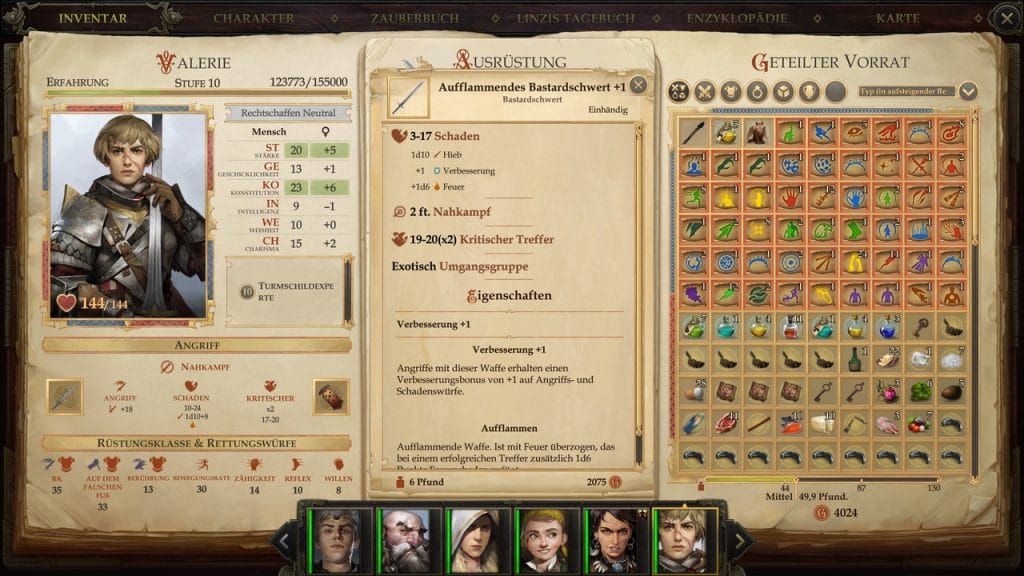
In Pathfinder: Kingmaker, the power of your heroes depends heavily on the items they are equipped with. Depending on which weapons or armor you prefer, you can skill talents that unlock additional bonuses (such as weapon focus or weapon specialization). Knowing in advance which type of weapon or armor to use best will help a lot. In addition, many items have special abilities that help a character with specific tasks, such as bonuses on tricks (open locks, disarm traps).
Very special items are so-called relics (also known as artifacts). You will always find fragments of relic items on your travels. Once you’ve found all fragments of a relic, go to the storyteller (waiting in your throne room) and let him assemble the item and tell you the story.
Below we have listed all important items and relics as well as their features. We are currently in the third act, but have taken additional information from Christopher Gerlach’s (Unikatze) extensive collection. We will be updating items from the following acts soon. Regarding the relics we have a lot of information from Galen’s Google-Sheet. Again we would like to thank for the helpful collection of information.
We’ll update this guide over time with more information as we progress in the game. We apologize for any inaccuracies or translation errors.
- Note: We have also added magical items to the list with a minimum bonus of +2. Items with a +1 bonus are only included in the list if they have additional attributes. All items have been sorted first by type and then by the highest general bonus.
List of magic and unique items & their locations
Key
AV = Armor Class
DC = Difficulty Class
DR = Damage Reduction
Melee Weapons & Shields
One-handed melee weapons
| Name | Type | Bonus | Map | Location / Requirements |
|---|---|---|---|---|
| Flaming Bastard Sword +1 | Bastard Sword | +1 Flaming | ? | ? |
| Arcane Protector | Dagger | +1 +3 to dodge Immunity to nauseated | Bridge over Gudrin River | Hidden in Bandit Camp |
| Lone House | Bartholomew Delgado (if you killed him) | |||
| Chaos Shard | Dagger | +2 Confusion | Candlemere Tower | Corpse on the way to the tower |
| Swordsman’s Passion | Dueling Sword | +2 Agile | Swamp Witch’s Hut | Behind the Owlbears |
| Lord Protector | Dueling Sword | +2 | Stag Lord’s Fort | Reward, if the Stag Lord is defeated within one month |
| Decapitator | Falcata | +2 Furious Keen | Womb of Lamashtu | Locked chest in western room |
| Frost Falchion +1 | Falchion | +1 Frost | Shrine of Lamashtu | Hidden in southwestern corner |
| Shock Greatsword +1 | Greatsword | +1 Shock | Womb of Lamashtu | Chest in central northern room |
| Mallet of Woe | Heavy Mace | +3 Freedom of movement | Dwarven Ruins | Hargulka |
| Skullcrusher | Heavy Mace | +2 Heavy Blow | Talon Peak | Behind the secret door |
| Shock Frost Heavy Mace +1 | Heavy Mace | +1 Shock Frost | Dwarven Ruins | Room near southern exit |
| Talon of the Wise | Kama | +2 | Lake Silverstep Village | Corpse in the southeast corner of the map |
| Mother’s Care | Kukri | +2 Frost Keen | Goblin Fort | Hidden and locked chest |
| Keen Kukri +1 | Kukri | +1 Keen | Ratnook Hill | Werrat |
| Keen Longsword +1 | Longsword | +1 Keen | Dwarven Ruins | Southwestern room |
| Cold Iron Longsword +1 | Longsword | +1 Cold Iron | Womb of Lamashtu | Corpse near Enlarged Treantlike Owlbear |
| Shock Sai +1 | Sai | +1 Shock | Ratnook Hill | Werrat |
| Slicer | Scimitar | +2 | Lake Silverstep Village | Chest near Cyclop’s Tomb |
| Scimitar +2 | Scimitar | +2 | Technic League Hideout (Companion quest Octavia and Regongar: Cruel Justice) | Quite at the beginning on a Fighter of the Technic League |
| Agile Shortsword +2 | Shortsword | +2 Agile | Dragonleaf Gulch | Corpse in the northeastern corner |
| Bound Thunder | Trident | +1 Shock Lightning Bolt 1/day | Lizardfolk Village | Lizardfolk King |
| Noble Hammer | Warhammer | +3 | Candlemere Tower | Locked box past the cave |
| Soot-Blackened Hammer | ? | ? | Dwarven Ruins | Room near southern exit |
Two-handed melee weapons
| Name | Type | Bonus | Map | Location / Requirements |
|---|---|---|---|---|
| Flaming Earth Braker +2 | Earth Braker | +2 Flaming | Bridge over Gudrin River | Corpse in Crag Linnorm’s Cave |
| Keen Elven Curve Blade +1 | Elven Curve Blade | +1 Keen | Empty Skull Rock | Hidden box inside northern cave |
| Beastrender | Falchion | +2 Animal Bane | Goblin Village | Barrel at hut in the northwest |
| Kneesplitter | Giant Bane | +2 Heavy Pick | Hunting Grounds | Hidden in locked area near Wyverns |
| Glaive +2 | Glaive | +2 Flaming | Bald Stones | Greater Nightmare |
| Second Execution | Greataxe | +1 Undead Bane | Lonely Barrow | Chest in room with Lone Warrior Skeleton |
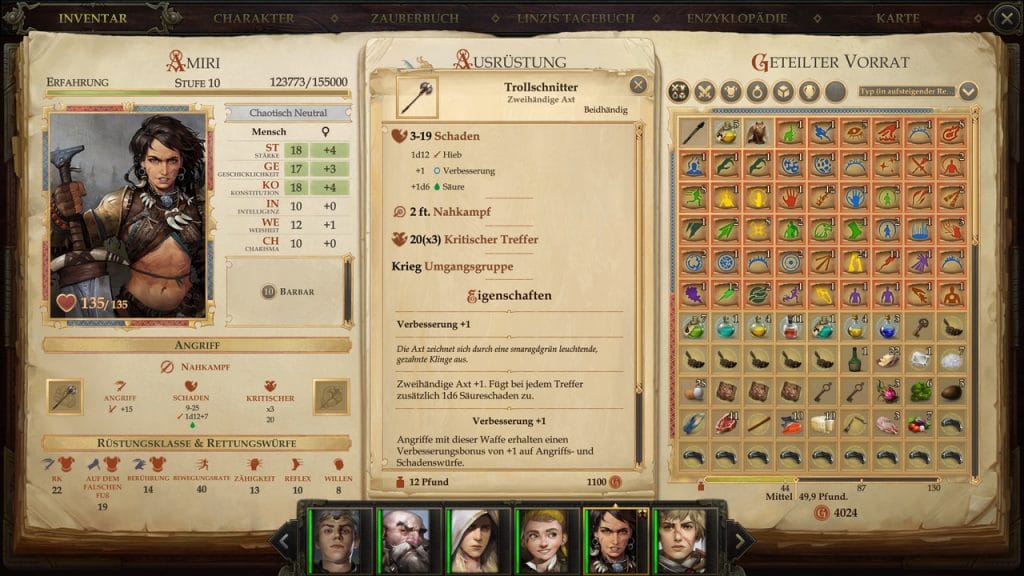
| Trollreaper | Greataxe | +1 Corrosive | Ruined Watchtower | Chest in tower |
| The Crusher | Greatclub | +2 Oversized | Quest: Troll Troubles | |
| Greatclub +2 | Greatclub | +2 | Saint Galvan’s Gullet | Cyclops |
| Greatsword +1 | Greatsword | +1 Frost | Dwarven Ruins | Hidden treasure near Kobold Artist |
| Lonely Barrow | Greater Skeletal Champion Berserker | |||
| Javelin +2 | Javelin | +2 | Womb of Lamashtu | Room with spiders, east of entrance |
| Ginormous Sword | Large Bastard Sword | +1 Oversized | Amiri | |
| Chilly Midnight | Sickle | +3 1d4 Dexterity damage on hit (DC 17 on Fortitude) | Dappled Quagmire | Chest near Hydra at the center of the map |
| Two-Handed Mace +2 | Two-Handed Mace | +2 | Stag Lord’s Fort | Auchs |
Shields
| Name | Type | Bonus | Map | Location / Requirements |
|---|---|---|---|---|
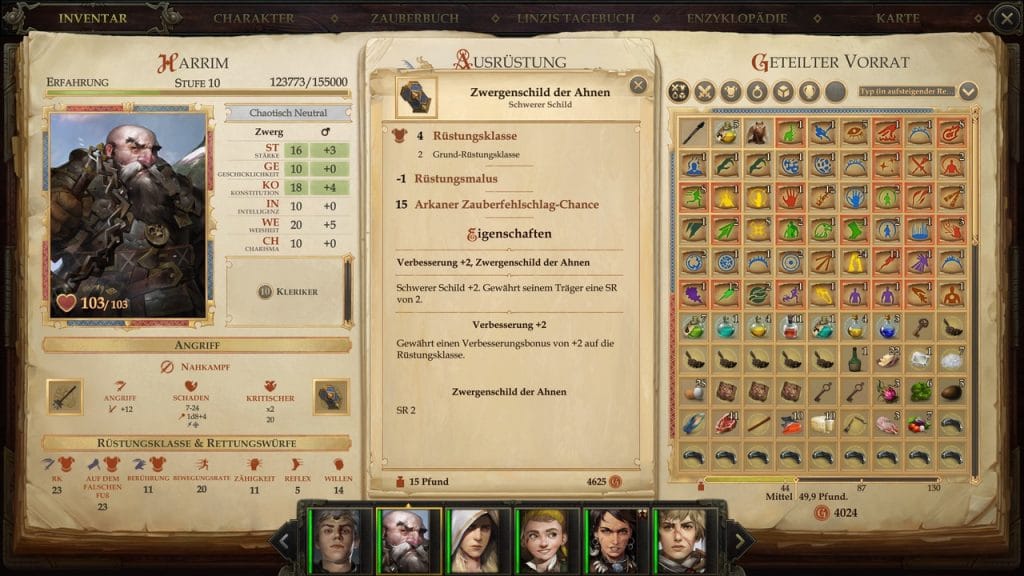
| Ancestral Dwarven Shield | Heavy Shield | +2 2 Damage Reduction | Candlemere Tower | Chest in the eastern upper area |
| Light Shield +2 | Light Shield | +2 | Wilderness Clearing | Hendric |
| Lake Silverstep Village | Cache east of the eastern house | |||
| Protector of the Unjust | ? | +2 +2 AC against lawful or good characters | Lone Home | Bandit leader |
| Flameguard | Tower Shield | +1 +3 on reflex saving throws +10 fire resistance -2 on attack rolls | ? | ? |
Ranged weapons
Two-handed ranged weapons
| Name | Type | Bonus | Map | Location / Requirements |
|---|---|---|---|---|
| Devourerer of Metal | Composite Longbow | +1 Oversized Corrosive Composite | Dwarven Ruins | Hidden and locked in a room near moon dial |
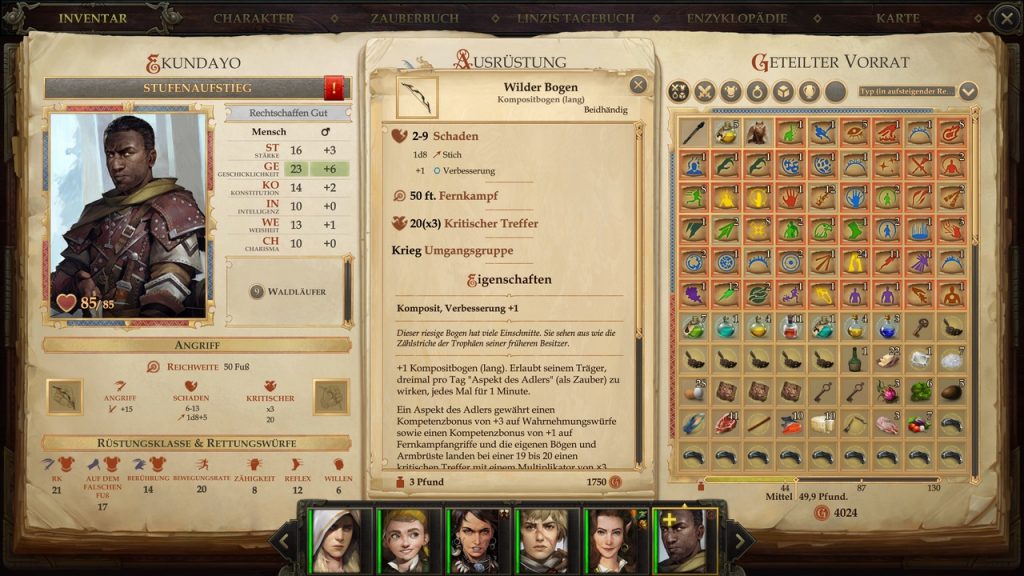
| Savage Bow | Composite Longbow | +1 Aspect of the Falcon 3/day Composite | Stag Lord’s Fort | Stag Lord |
| Lucky Longbow | Composite Longbow | +1 Composite The luck of the draw | Monster Den | Corpse near Wyvern |
| Shock Light Crossbow +1 | Light Crossbow | +1 Shock | Dwarven Ruins | Hidden treasure |
Armor & Cloaks
Headgear
| Name | Type | Bonus | Map | Location / Requirements |
|---|---|---|---|---|
| Expert’s Hat | Hat | +1 to all skill checks | Oleg’s Outpost | First floor, chest next to bed |
| Professor’s Hat | Hat | Wearable bag of holding +2 to all skill checks | Bridge over Gudrin River | Corpse in Crag Linnorm’s Cave |
| Headband of Vast Intelligence +4 | Headband | +4 Intelligence | Lone House | Bartholomew Delgado (if you kill him) |
| Headband of Vast Intelligence +2 | Headband | +2 Intelligence | Technic League Encampment | Kalannah |
| Ratnook Hill | Werrat | |||
| Dwarven Ruins | Hidden treasure | |||
| Headband of Inspired Wisdom +4 | Headband | +4 Wisdom | Womb of Lamashtu | Locked chest in room with Spiders, east of entrance |
| Headband of Inspired Wisdom 2 | Headband | +2 Wisdom | Old Sycamore Caves | Hidden chamber |
| Dwarven Ruins | Room with statues and Kobold Teacher | |||
| Headband of Alluring Charisma +4 | Headband | +4 Charisma | Dwarven Ruins | Tartuk |
| Ironstone Gully | Box in northwestern corner | |||
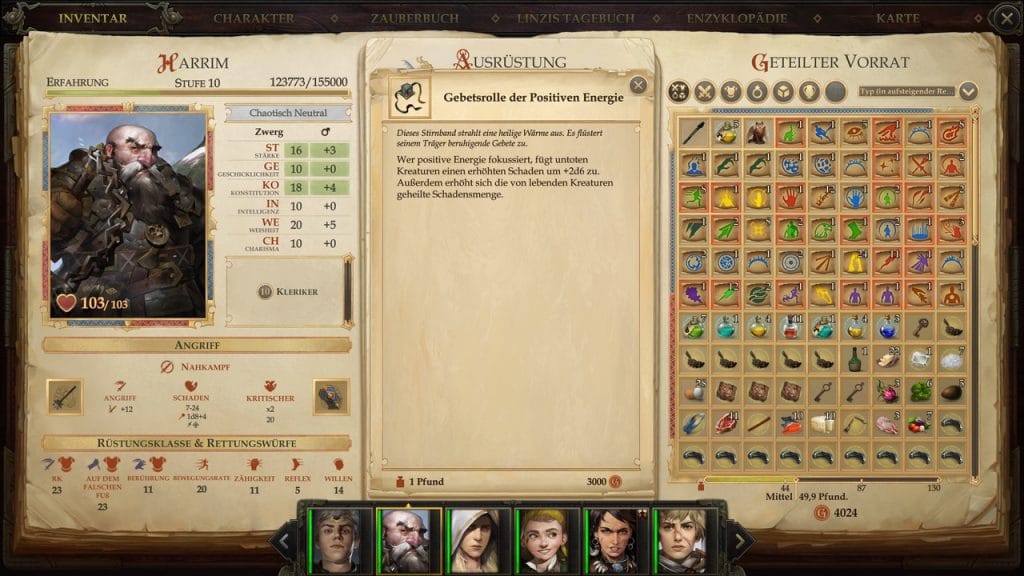
| Phylaktery of Positive Channeling | Headband | +2d6 damage / healing while channeling positive energy | Swamp Witch’s Hut | Free Wilbur the Spectre |
| Stubborn Head | Helmet | +3 AC +3 Dexterity +4 Saves against Death | Goblin Fort | Goblin King |
| Stag Helmet | Helmet | +1 to attack rolls against flat footed and flanked targets | Stag Lord’s Fort | Stag Lord |
| Helmet of Battlefield Clarity | Helmet | +2 to will saves +2 to attack rolls, if the wearer uses the Combat Expertise Feat | ? | ? |
Armor
| Name | Type | Bonus | Map | Location |
|---|---|---|---|---|
| Banded Mail +3 | Banded Mail | +3 AC | Womb of Lamashtu | Room with large Flower |
| Banded Mail +2 | Banded Mail | +2 AC | Six Bears Camp | Pariah Quest: Fionn |
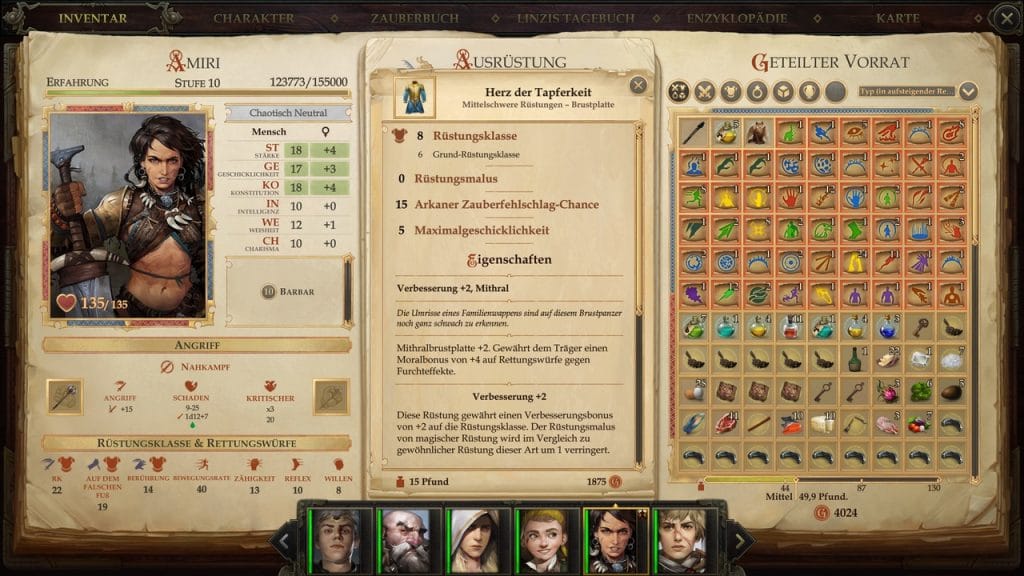
| Heart of Valor | Breastplate | +2 AC +4 saving throws against fear Mithral | Dwarven Ruins | Chest in the south |
| Breastplate +2 | Breastplate | +2 AC | Ruined Watchtower | Ruined Watchtower: Chest in Tower |
| Assassin’s Chainshirt | Chainmail | +4 AC +4 to critical confirmation roll | Tenacious Marsh | Corpse |
| Chainmail +2 | Chainmail | +2 AC | Dwarven Ruins | Chest in room with spiders |
| Lonely Barrow | Southern Crypt | |||
| Lake Silverstep Village | Ivar | |||
| Silverstep Grove | Ivar | |||
| Blessed Path | Full Plate | +2 AC +2 Wisdom +2 Charisma +4 saves against compulsion and poison effects +2/day Smite Evil, if worn by a paladin Only wearable by good characters | Dwarven Ruins | Solve the Sun-Moon-Puzzle |
| Full Plate +2 | Full Plate | +2 AC | Candlemere Tower | To the right of the entrance to upper area |
| Half Plate +2 | Half Plate | +2 AC | Bridge over Gudrin River | Trapped chest past the Tazylwyrms |
| Hide Armor +3 | Hide Armor | +3 AC | Dwarven Ruins | Jazon |
| Saint Galvan’s Gullet | Cyclops | |||
| Hide Armor +2 | Hide Armor | +2 AC | Stag Lord’s Fort | Nugrah |
| Leather Armor +2 | Leather Armor | +2 AC | Ratnook Hill | Werrat |
| Swamp Witch’s Hut | Corpse in hidden western area | |||
| Bombardier’s Vest | Leather Armor | +1 AC +2 to attack rolls with bombs or similar weapons | Ratnook Hill | Werrat |
| Padded Armor +2 | Padded Armor | +2 AC | Dragonleaf Gulch | Corpse in northeastern corner |
| Robe of Earth | Robe | +2 DC to acid spells | Candlemere Tower | Hidden box near the boat |
| Robe of Air | Robe | +2 DC bonus to electricity spells | Goblin Fort | Box near first Prisoner’s Cage |
| Robe of Water | Robe | +2 DC to cold spells | Lonely Barrow | Eastern Room |
| Scale Mail +2 | Scale Mail | +2 AC | Wilderness Clearing | Hendric |
| Vest of Hundred Pockets | Studded Armor | +2 AC +5 Trickery | Goblin Fort | Locked box Southwest of Goblin King’s Court |
| Studded Leather Armor +2 | Studded Leather Armor | +2 AC | Ruined Watchtower | Corpse in the southwest |
Cloaks
| Name | Bonus | Map | Location / Requirements |
|---|---|---|---|
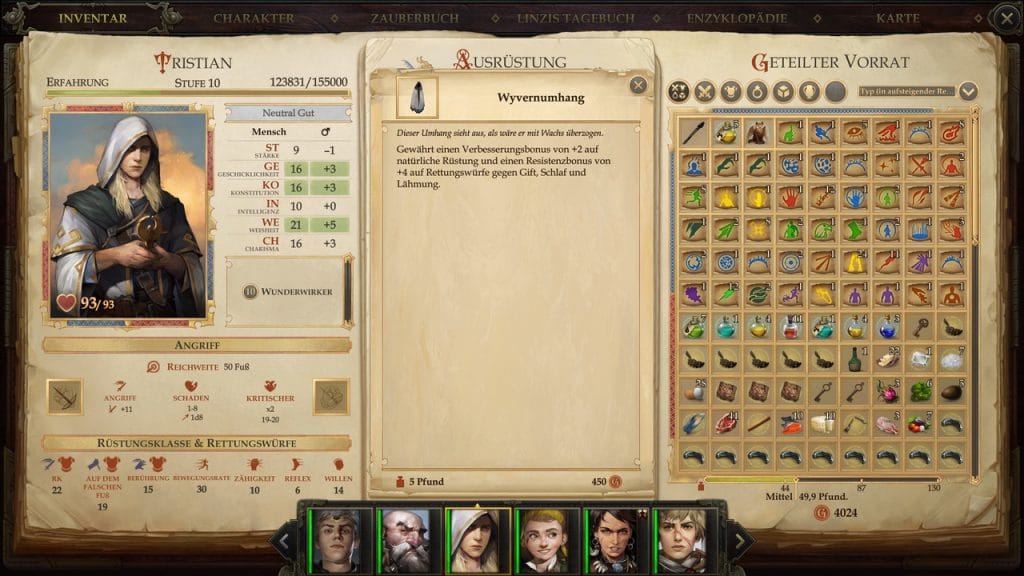
| Wyvern Skin Cloak | +2 Natural armor +4 Saving throws against poison, sleep and paralysis | Bald Hilltop | Quest: An Ancient Curse |
| Cloak of Resistance +2 | +2 on all saving throws | Lone House | Bartholomew Delgado (if you kill him) |
| Swamp Witch’s Hut | Reward, if you set Dorsy the Ghoul free | ||
| Secluded Lodge | Second Floor, behind locked door | ||
| Swamp Ruins | Devourer | ||
| Cloak of Winter Veil | +1 to all saving throws +10 cold resistance | Stag Lord’s Fort | Stag Lord |
| Cloak of Shadows | +10 to all Stealth skill checks Immune to blindness and dazzling | Lizardfolk Village | Outside village, hidden chest near Monitor Lizards |
| Cloak of Heroism | Heroism 1/day | ? | ? |
Gloves
| Name | Bonus | Map | Location / Requirements |
|---|---|---|---|
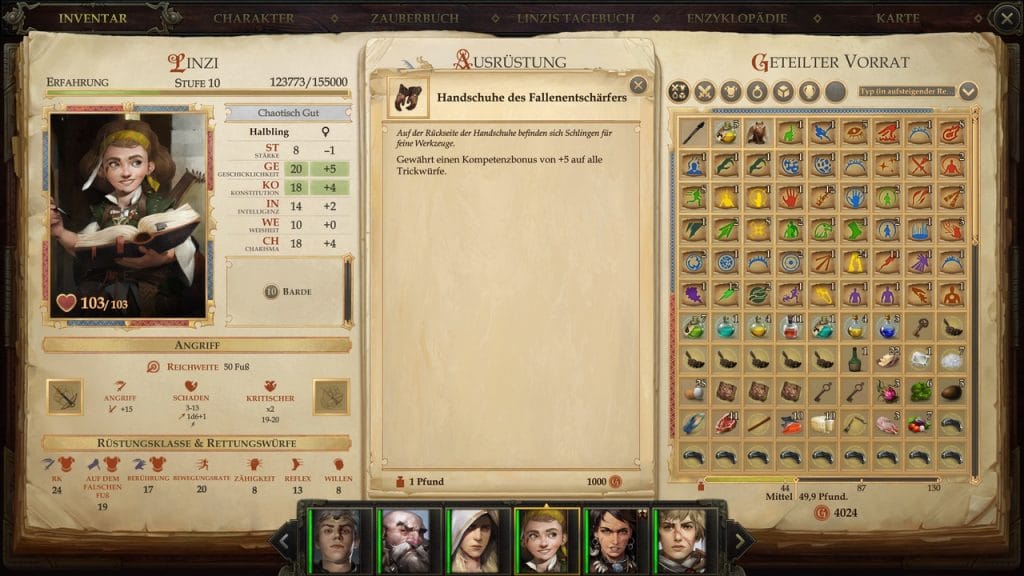
| Trapspringer’s Gloves | +5 Trickery | ? | ? |
| Gloves of Dueling | ? | Swamp Witch’s Hut | North of Scythe Tree in a poison cloud |
| Soot-Blackened Gloves | ? | Dwarven Ruins | Kargadd |
Bracers
| Name | Bonus | Map | Location / Requirements |
|---|---|---|---|
| Bracers of Armor +5 | +5 AC | Hilltop Trail, Other World | Corpse in Other World |
| Bracer’s of Armor +4 | +4 AC | Goblin Fort | Box near drunk Goblins |
| Womb of Lamashtu | Locked chest in southeastern room | ||
| Empty Skull Rock | Hidden box inside northern cave | ||
| Bracers of Armor +3 | +3 AC | Dwarven Ruins | Chest in Furnace Room |
| Bracers of Archery | +2 on attack rolls with a bow +1 on damage rolls | Stag Lord’s Fort | Stag Lord |
| Lone House | Wizard’s Laboratory, chest in secret room | ||
| Gear’s Rule | +1 to attack rolls with bombs (+2 at level 12) +2 to saving throws against mind-affecting, death, paralysis, disease, stun, poison effects Resists Fatigue for 8 hours past the usual limit Immune to fatigue and Exhaustion at level 20 Damage of bombs is calculated as if the owner is an alchemist of 2 levels higher +1 Save DCs Focusing Surge | Technic League Hideout (Companion Quest Octavia and Regongar: Cruel Justice) | Locked Chest in Janush’s Storeroom (DC: Trickery 43) |

Belts
| Name | Bonus | Map | Location / Requirements |
|---|---|---|---|
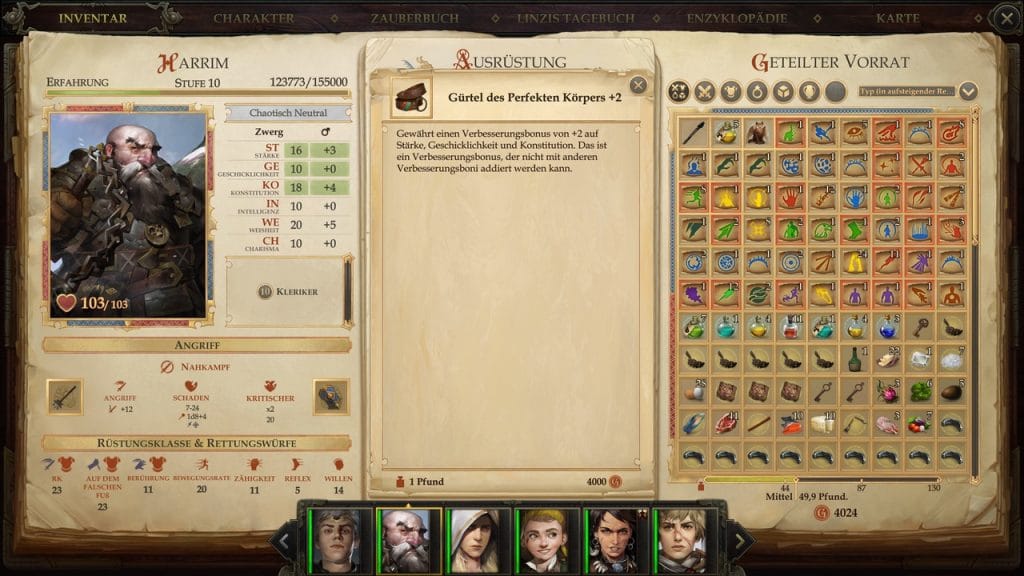
| Belt of Physical Perfection +2 | +2 Strength +2 Dexterity +2 Constitution | Ruined Watchtower | Torag’s Statue |
| Belt of Physical Might +4 | +4 Strength +4 Constitution | Dwarven Ruins | Hargulka |
| Belt of Physical Might +2 | +2 Strength +2 Constitution | Dwarven Ruins | Kargadd |
| Belt of Physical Form +4 | +4 Dexterity +4 Constitution | Goblin Fort | Shaman in the Sothwest |
| Womb of Lamashtu | Chest in one of the eastern rooms | ||
| Belt of Physical Form +2 | +2 Dexterity +2 Constitution | Silverstep Grove | Ivar |
| Belt of Giant Strength +4 | +4 Strength | Swamp Ruins | Devourer |
| Belt of Giant Strength +2 | +2 Strength | Old Oak | Troll |
| Belt of Incredible Dexterity +4 | +4 Dexterity | Goblin Village | Hidden sack west of Goblin Merchant |
| Belt of Incredible Dexterity +2 | +2 Dexterity | Old Sycamore Caves | Sootscale |
| Ratnook Hill | Werratte | ||
| Dwarven Ruins | Kobold Flame Shaman | ||
| Belt of Mighty Constitution +2 | +2 Constitution | Stag Lord’s Fort | Auchs |
| Lone House | Bandit leader | ||
| Belt of Mighty Constitution +4 | +4 Constitution | Lonely Barrow | Secret room at the end of the southwestern corridor |
Boots
| Name | Bonus | Map | Location / Requirements |
|---|---|---|---|
| Boots of Elvenkind | +5 Mobility | Stag Lord’s Fort | Stag Lord |
| Swiftfoot Boots | +10 Movement speed | Six Bears Camp | Fionn (Pariah Quest) |
Jewelry
Jewelry
| Name | Type | Bonus | Map | Location / Requirements |
|---|---|---|---|---|
| Amulet of Natural Armor +3 | Amulet | +3 AC | Swamp Ruins | Devourer |
| Amulet of Natural Armor +2 | Amulet | +2 AC | Lone House | Bandit |
| Dwarven Ruins | Greater Trollhound | |||
| Ancient Mine | Ancient Wyvern | |||
| Lake Silverstep Village | Cache near southwestern house | |||
| Saint Galvan’s Gullet | Cyclops | |||
| The Nymph’s Gift | Amulet | +2 AC against ranged attacks | Quest-Reward Guardian of the Bloom | |
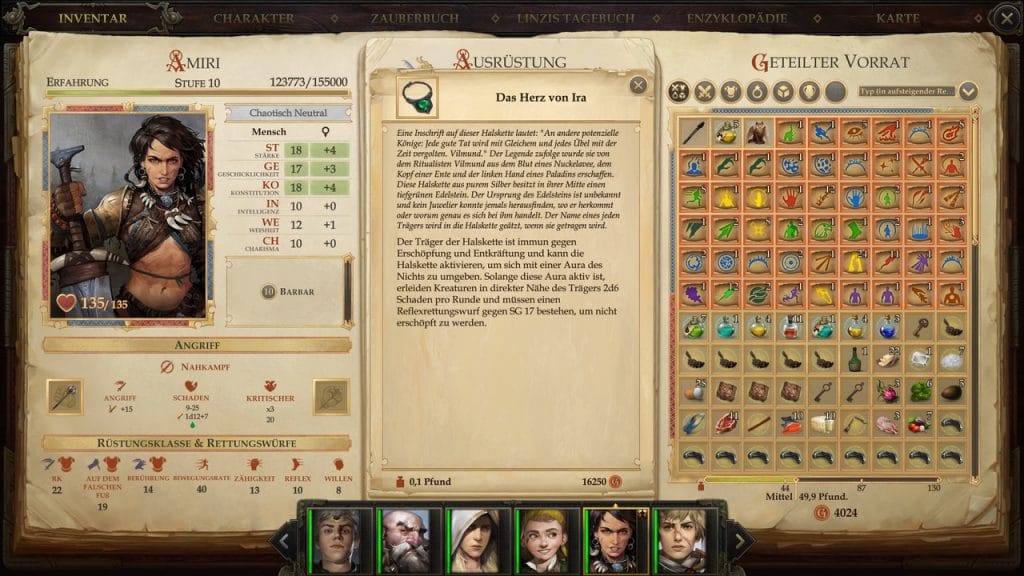
| The Heart of Ira | Amulet | Immune to fatigue and exhaustion Can activate aura, dealing 2d6 damage per round Enemies inside the aura have to succeed on a reflex throw (DC 17) to not becoming fatigued | Varnhold | Cart in the northwest |
| Amulet of Agile Fists | Amulet | ? | Lone House | Next to Trader’s corpse |
| Amulet of Mighty Fists +2 | Amulet | ? | Saint Galvan’s Gullet | Hidden cache inside the cave |
| Ring of Protection +2 | Ring | +2 AC | Swamp Witch’s Hut | Near werewolves in the east |
| Dwarven Ruins | Tartuk | |||
| Saint Galvan’s Gullet | Cyclops | |||
| Swamp Ruins | Devourer | |||
| Ring of Luck | Ring | +1 to all saving throws | Dwarven Ruins | Tartuk |
| Lonely Barrow | Room with Lonely Warrior | |||
| Energy Source | Ring | 2 additional Channel Energy per day | Goblin Fort | Box in the eastern part of the Fort |
| Paragon of Winter | Ring | Cold Resistance 30 and vulnerability to fire for wearer and his summons | Goblin Fort | Shaman in the southwest |
| Shelyn’s Embrace | Ring | Teleports Linzi to a safe location should she fall in battle | Linzi |
Special bonuses explained
Some of the bonuses in the lists above have special effects.
- Corrosive: +1d6 acid damage
- Flaming: +1d6 fire damage
- Frost: +1d6 cold damage
- Shock: +1d6 elctricity damage
- Heavy Blow: Stuns for 1d4 rounds at critical hit
- Agile: A wielder with the Weapon Finesse Feat can choose to apply his Dexterity modifier to damage rolls instead of the Strength modifier (if higher).
- Confusion: Chance to confuse enemy on hit
- Furious: When the wielder is raging or under the effect of a rage spell, the weapon’s enhancement bonus is +2 higher than normal
- Keen: Doubles the threat range
- Oversized: -2 to attack rolls
- Animal Bane: +2 attack rolls and +2d6 damage against animals
- Undead Bane: +2 attack rolls and +2d6 damage against undead
- Cold Iron: prevents regeneration
- Composite: Strength bonus is added to bow damage
- Mithral: Extra strong, extra light
- Focusing Surge: Once per day gain Fast Healing and Immunity to poison, death effects, paralysis, stun, disease for 5 rounds (10 rounds at level 16), adds the effects of Targeted Bomb Admixture extract
- The luck of the draw: x4 critical multiplier
List of artifacts & locations of the corresponding fragments
- Note: This list only includes relics that the storyteller can transform into wearable items, so called artifacts. Relics and fragments that “only” give experience and gold are not listed here.
We have taken some of the information from this list from Galen’s Relic Fragments datasheet. Missing translations or further information will be updated as soon as we find the relevant items in in-game.
Necklace of Double Crosses
Amulet
- +4 Trickery
- +4 Stealth
- +4 Mobility
- +2d6 Sneak Attack
- Allies provoke Attack on Opportunity when moving through a square you threaten
Locations of Fragments
| Name of Fragment | Map | Location |
|---|---|---|
| Scorched Fragment of a Necklace | Ancient Tomb | Corpse of a Guard of Tartuccio |
| Scorched Fragment of a Necklace | Thorn Ford | Twig pile near river west of Kressle |
| Scorched Fragment of a Necklace | Old Sycamore | Corpse near kobold entrance |
| Scorched Fragment of a Necklace | Old Sycamore Caves | Top level, rock pile in the lower left corner above the mine cart |
| Scorched Fragment of a Necklace | Old Sycamore Caves | Bottom level, pile of stones near bug corpse in top right corner |
| Scorched Fragment of a Necklace | Three-Pine Islet | Little tombstone on island |
| Scorched Fragment of a Necklace | Trail in the Hills | Debris in the Southeast corner |
Ring of Reckless Courage
Ring
- +4 Charisma
- +4 Stealth
- +4 Trickery
- +4 Critical Confirmation
- +2 DC Mind-Affecting Spells
- -2 Wisdom
- -4 Perception
- -2 Will
- -10 Saving Throw against Traps
- On Receive Critical Hit Confusion for 1d4 turns
Locations of Fragments
| Name of Fragment | Map | Location |
|---|---|---|
| Melted Shard of a Ring | Bridge over Gudrin River | Northeastern part of the map, near the Goblin Prince or pack of Wolves, depending on story progress |
| Melted Shard of a Ring | Bridge over Gudrin River | Near the northwestern entrance |
| Melted Shard of a Ring | Wolf Lair | Little box on the ridge |
| Melted Shard of a Ring | Lonely Barrow | Body in first chamber |
| Melted Shard of a Ring | Hunting Grounds | Hydra, a little southeast of the center of the map |
| Melted Shard of a Ring | Hunting Grounds | Chest in the northeastern corner of the map, southwest of where the Embeth Travellers fight Wyvern |
| Melted Shard of a Ring | Hunting Grounds | Primal Fly Trap in the northeastern corner of the map |
| Melted Shard of a Ring | Goblin Village | Rubble on a hill |
| Melted Shard of a Ring | Goblin Fort | Crate next to prisoner’s cage, near fort entrance |
| Melted Shard of a Ring | Goblin Fort | Goblin Commando, upper part of goblin fort |
| Melted Shard of a Ring | Womb of Lamashtu | Primal Giant Spider Matriarch, western door before Other World Portal |
| Melted Shard of a Ring | Shrine of Lamashtu | To the left of the crossroads |
| Melted Shard of a Ring | Dragonleaf Gulch | Pile of rubble next to the Fly Trap |
Trailblazer’s Helm
Helm
- 2 DR of Ranged Attacks
- 10 DR of Falling or Thrown Rocks
- Cast Good Hope and Crushing Despair 1/Day
- +3 Dodge Bonus to AC against Giants & Goblinoid Subtypes
- +3 Insight Bonus to Saves
Locations of Fragments
| Name of Fragment | Map | Location |
|---|---|---|
| Dwarven Helm Shard | Ruined Watchtower | Top of the cliff in the upper right corner |
| Dwarven Helm Shard | Ruined Watchtower | Hidden chest in the northwest corner |
| Dwarven Helm Shard | Ruined Watchtower | Hidden under a rock near the bottom of the center bridge |
| Dwarven Helm Shard | Lone House | Upper right corner |
| Dwarven Helm Shard | Dwarven Ruins Entrance | Box |
| Dwarven Helm Shard | Dwarven Ruins Entrance | Chest |
| Dwarven Helm Shard | Dwarven Ruins | Top Floor, chest in room with Kargadd |
| Dwarven Helm Shard | Dwarven Ruins | Top Floor, chest next to Nagrundi, near top right entrance to lower level |
| Dwarven Helm Shard | Dwarven Ruins | Bottom Floor under floor stone next to the fire in the room with the glowing symbol |
| Dwarven Helm Shard | Dwarven Ruins | Bottom Floor, northern corner of the map, underneath a hidden stone |
Forest Knight’s Bracers
Bracers
- When wearer would become Shaken, +2 Morale Bonus to Attack Rolls, Saving Throws & Skill Checks for same duration as shaken effect & remove shaken
- When wearer would become Frightened or Confused replace condition with Hideous Laughter for equal duration
- Cast Freedom of Movement 1 Minute 1/Day
- When hit by monster of the Fey subtype, frighten monster for 1d4 rounds, will save to negate
Locations of Fragments
| Name of Fragment | Map | Location |
|---|---|---|
| Shard of Knights’ Bracers | Ford Across the Skunk River | Hidden cache in wall near the river |
| Shard of Knights’ Bracers | Ruined Watchtower | Chest to the west of the stone bridge |
| Shard of Knights’ Bracers | Lone House | Bandit on the western side |
| Shard of Knights’ Bracers | Swamp Witch’s Hut | Northwest corner of the map |
| Shard of Knights’ Bracers | Hodag Lair | Hidden pile of twigs, eastern side of map |
| Shard of Knights’ Bracers | Lizardfolk Village | Locked chest in Chieftain’s Hut |
| Shard of Knights’ Bracers | Hunting Grounds | Giant Fly Trap, to the left of the centre of the map |
| Shard of Knights’ Bracers | Goblin Fort | Hidden crate at the wall, eastern part of the map |
| Shard of Knights’ Bracers | Womb of Lamashtu | Room with Redcap and Giant Spiders |
Cloak of Sold Souls
Cloak
- -4 Constitution
- +2 Caster Level for Necromany and Summoning Subtype Spells
- +2 DC for Necromancy Spells
- Vampiric Touch 3/Day
- to unequip: Remove Curse DC 25 (if failed instantly kill character and summon a
- Thanadaemon or an Astradaemon if character is level 20)
Locations of Fragments
| Name of Fragment | Map | Location |
|---|---|---|
| Ancient Scrap of Script-Covered Leather | Lost Barrow | Sarcophagus behind southwestern side door |
| Ancient Scrap of Script-Covered Leather | Lost Barrow | Same room as above, southern Sarcophagus |
| Ancient Scrap of Script-Covered Leather | Overgrown Cavern | Small rock to the left of the entrance |
| Ancient Scrap of Script-Covered Leather | Varnhold | Box next to western house, south of river |
| Ancient Scrap of Script-Covered Leather | Varnhold Fort | Inside the house, in a box in the first storage room to the left of the first trap in the second corridor |
| Ancient Scrap of Script-Covered Leather | Varnhold Fort | Inside the house, in a box in the second storage room to the left of the second trap in the second corridor |
| Ancient Scrap of Script-Covered Leather | Kellid Barbarian Camp | Corpse in the left ravine near the entrance |
| Ancient Scrap of Script-Covered Leather | Sepulcher of Forgotten Heroes | Behind the red door in the east |
| Ancient Scrap of Script-Covered Leather | Sepulcher of Forgotten Heroes | Northern Room with blue timed Switch |
| Ancient Scrap of Script-Covered Leather | City of Hollow Eyes | Corpse in the northwestern ruins |
| Ancient Scrap of Script-Covered Leather | City of Hollow Eyes | Dread Zombie Cyclops in the northwestern Ruins |
| Ancient Scrap of Script-Covered Leather | Gates to the Valley of the Dead | Beyond the Gate of the Dead |
| Ancient Scrap of Script-Covered Leather | Vordakai’s Tomb | Past the crow who asks for a companion’s name |
| Ancient Scrap of Script-Covered Leather | Vordakai’s Tomb | Western exit of the room with Soul Eaters and a giant undead Cyclops |
| Ancient Scrap of Script-Covered Leather | Vordakai’s Tomb | Basement, first western corridor out of the oil pit |
| Ancient Scrap of Script-Covered Leather | Vordakai’s Tomb | Basement, in the room with Willas Gunderson, perception check on sarcophagus |
Tiger’s Stripes
Hide (?)
- +5 AC (?)
- Become a Smilodon at will (as per Beast Shape IV) 1 minute/level
- +5 enhancement to weapons while in Smilodon form
Locations of Fragments
| Name of Fragment | Map | Location |
|---|---|---|
| Leather Scrap covered in Ancient Runes | Swamp Ruins | Near entrance |
| Leather Scrap covered in Ancient Runes | Swamp Ruins | Ferocious Devourer |
| Leather Scrap covered in Ancient Runes | Tenacious March | East of Acid Slug |
| Leather Scrap covered in Ancient Runes | Verdant Chambers | Southeast of the rubble, southeast of the stairs |
| Leather Scrap covered in Ancient Runes | Abandoned Keep | First room to the left as you exit the library to the west |
| Leather Scrap covered in Ancient Runes | Fossil Fields | Sorcerer Medusa on river bank |
| Leather Scrap covered in Ancient Runes | Desecrated Cairn | treasure pile |
| Leather Scrap covered in Ancient Runes | Armag’s Tomb | Corpse of a Barbarian in the eastern corridor of the ice maze |
| Leather Scrap covered in Ancient Runes | Armag’s Tomb | Southeast exit to lower level, crate in the north of that room |
| Leather Scrap covered in Ancient Runes | Armag’s Tomb | Basement, chest in the southwest corner of the room to the east of the solitary iron golem |
| Leather Scrap covered in Ancient Runes | Armag’s Tomb | Basement, chest in the very center of the map, hidden door on the eastern edge |
| Leather Scrap covered in Ancient Runes | Armag’s Tomb | Basement, pile of bones in the southeast of the hidden door mentioned above |
| Leather Scrap covered in Ancient Runes | Armag’s Tomb | Hidden crate in Zoreks room, southwest of the stone king on a throne |
| Leather Scrap covered in Ancient Runes | Armag’s Tomb | Chest on western wall in Armag’s room |
| Leather Scrap covered in Ancient Runes | Armag’s Tomb | Basement, hidden in the eastern room, north of the hidden door |
| Leather Scrap covered in Ancient Runes | Armag’s Tomb (?) | ? |
| Leather Scrap covered in Ancient Runes | Rill and Spill | Lady of Shallows, Portal room |
Star Commander’s Gloves
Gloves
- +8 Strength
- Shoot a laser (ranged touch attack) dealing 4d6 damage at will
Locations of Fragments
| Name of Fragment | Map | Location |
|---|---|---|
| Piece of Skymetal | Dappled Quagmire | Southeast |
| Piece of Skymetal | Dappled Quagmire | Chest in the north |
| Piece of Skymetal | Abandoned Keep | Room with Nyrissa, Defaced Sister and Remus |
| Piece of Skymetal | Verdant Chambers | Either climb onto battlements, then use tree to get down or jump across the gorge to the east of the entrance |
| Piece of Skymetal | Raspberry Gully | Corpse of Druid on the eastern side |
| Piece of Skymetal | Charred Ruins | Skillfully-made Iron Golem |
| Piece of Skymetal | Gnawed Rocks | Gargoyle Edritch Chieftan |
| Piece of Skymetal | Armag’s Tomb | Bone pile in room with the Ferocious Devourer |
| Piece of Skymetal | Ornate Ruins | Golden Golem |
| Piece of Skymetal | Giggling Hill | Corpse in the northeastern corner |
| Piece of Skymetal | Pitax Royal Palace | Gaetane |
| Piece of Skymetal | Pitax Royal Palace | First room to the left after Gaetane’s room |
| Piece of Skymetal | Pitax Royal Palace | Eastern corner, second room of the end of the hallway |
| Piece of Skymetal | Pitax Port | southeastern corner, on the docks |
| Piece of Skymetal | Middle of Nowhere | Corpse in the southwestern corner |
| Piece of Skymetal | The Menagerie | Crate in the northern cavern |