
Solve the light puzzle in the prayer rooms of Silent Hill f and complete the “Farewell Ceremony” – we’ll walk you through every step.
You’ll reach the prayer rooms in Silent Hill f after cracking the locker codes in the middle school and opening the “Secret Box.” Here’s how to solve the light puzzle and reach the key in front of the cage.
Find three fox crests for Rinko
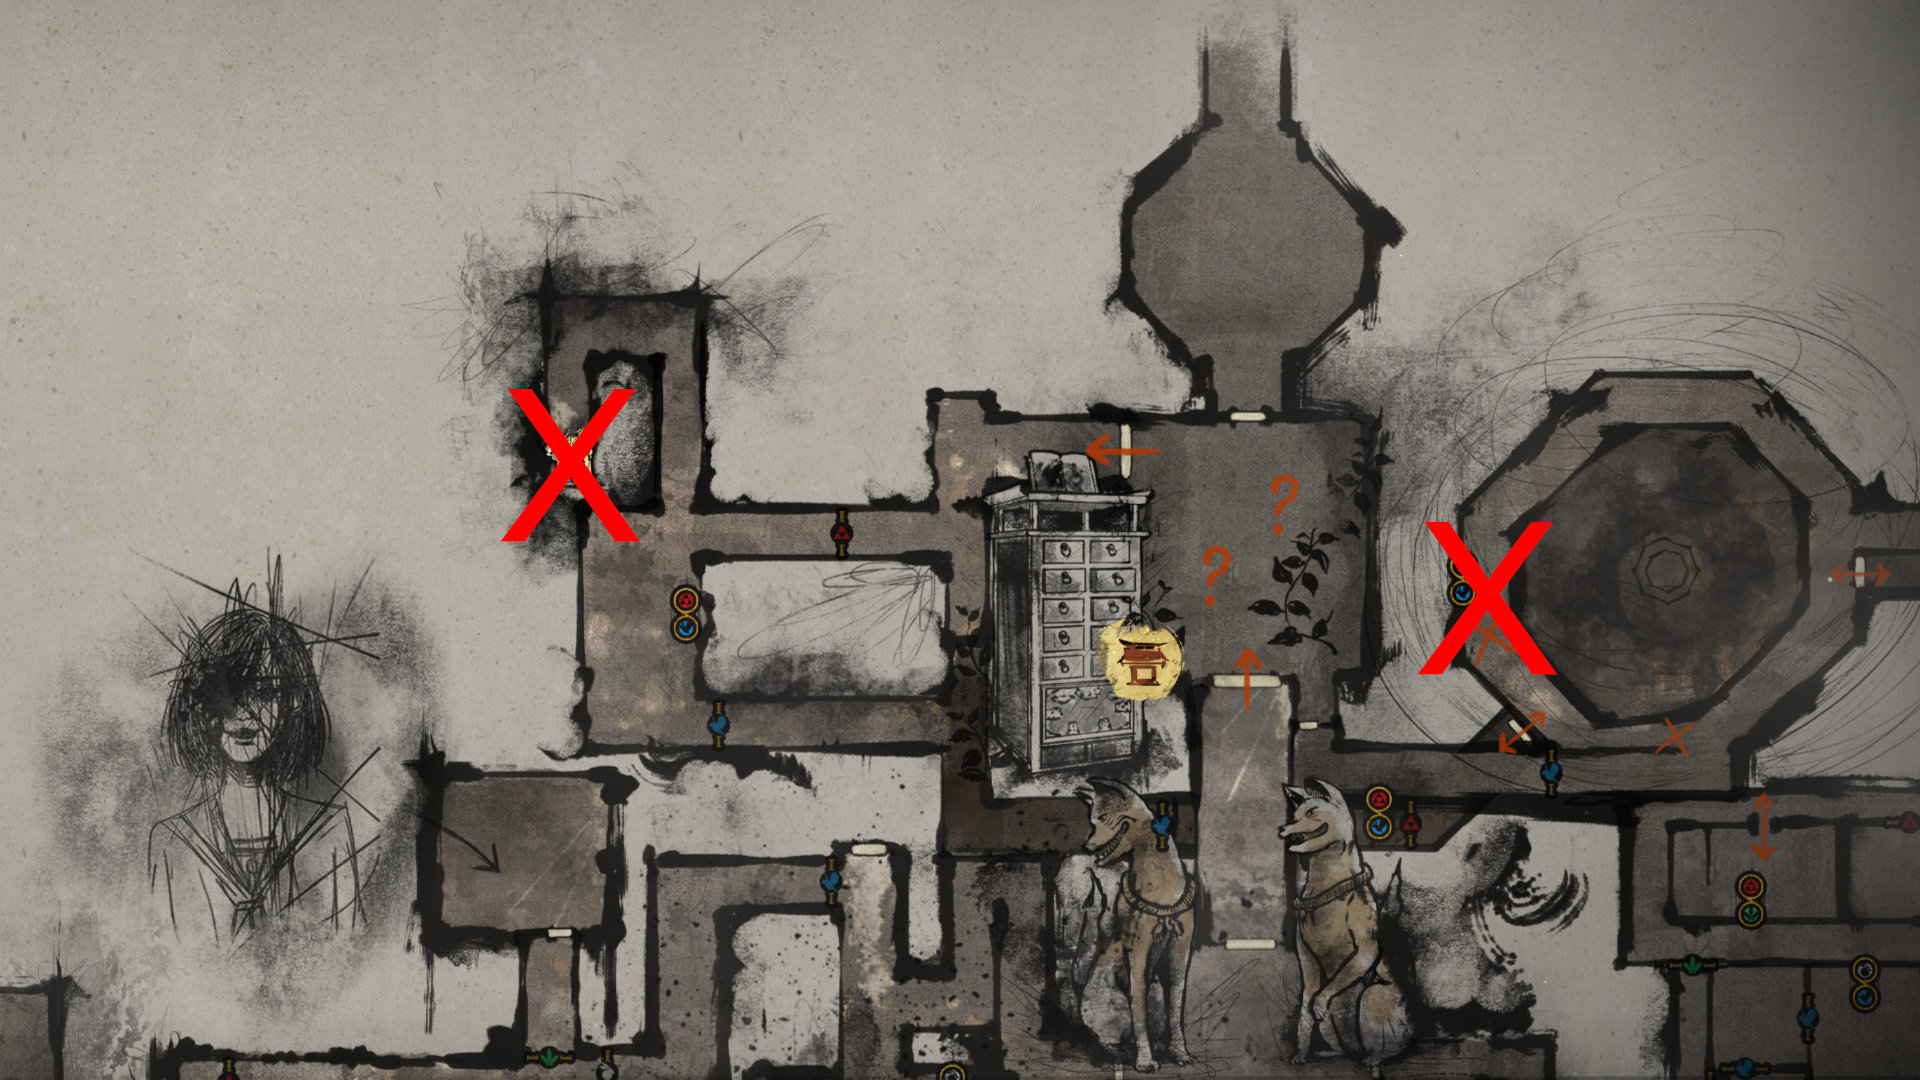
Your path through the prayer rooms starts with a relatively simple switch puzzle: you’ll pass several stations where you can flip a switch to one of two colors. Doing so opens all doors marked with that color. The map shows you exactly which doors are affected, making it easy to plan your route.
In the first section, you’ll need to find three crests that fit into the mechanism lowering Rinko’s cage. You’ll enter three rooms where you must interact with desk lamps, which changes the environment. You’ll find the crests by interacting with these objects in the rooms:
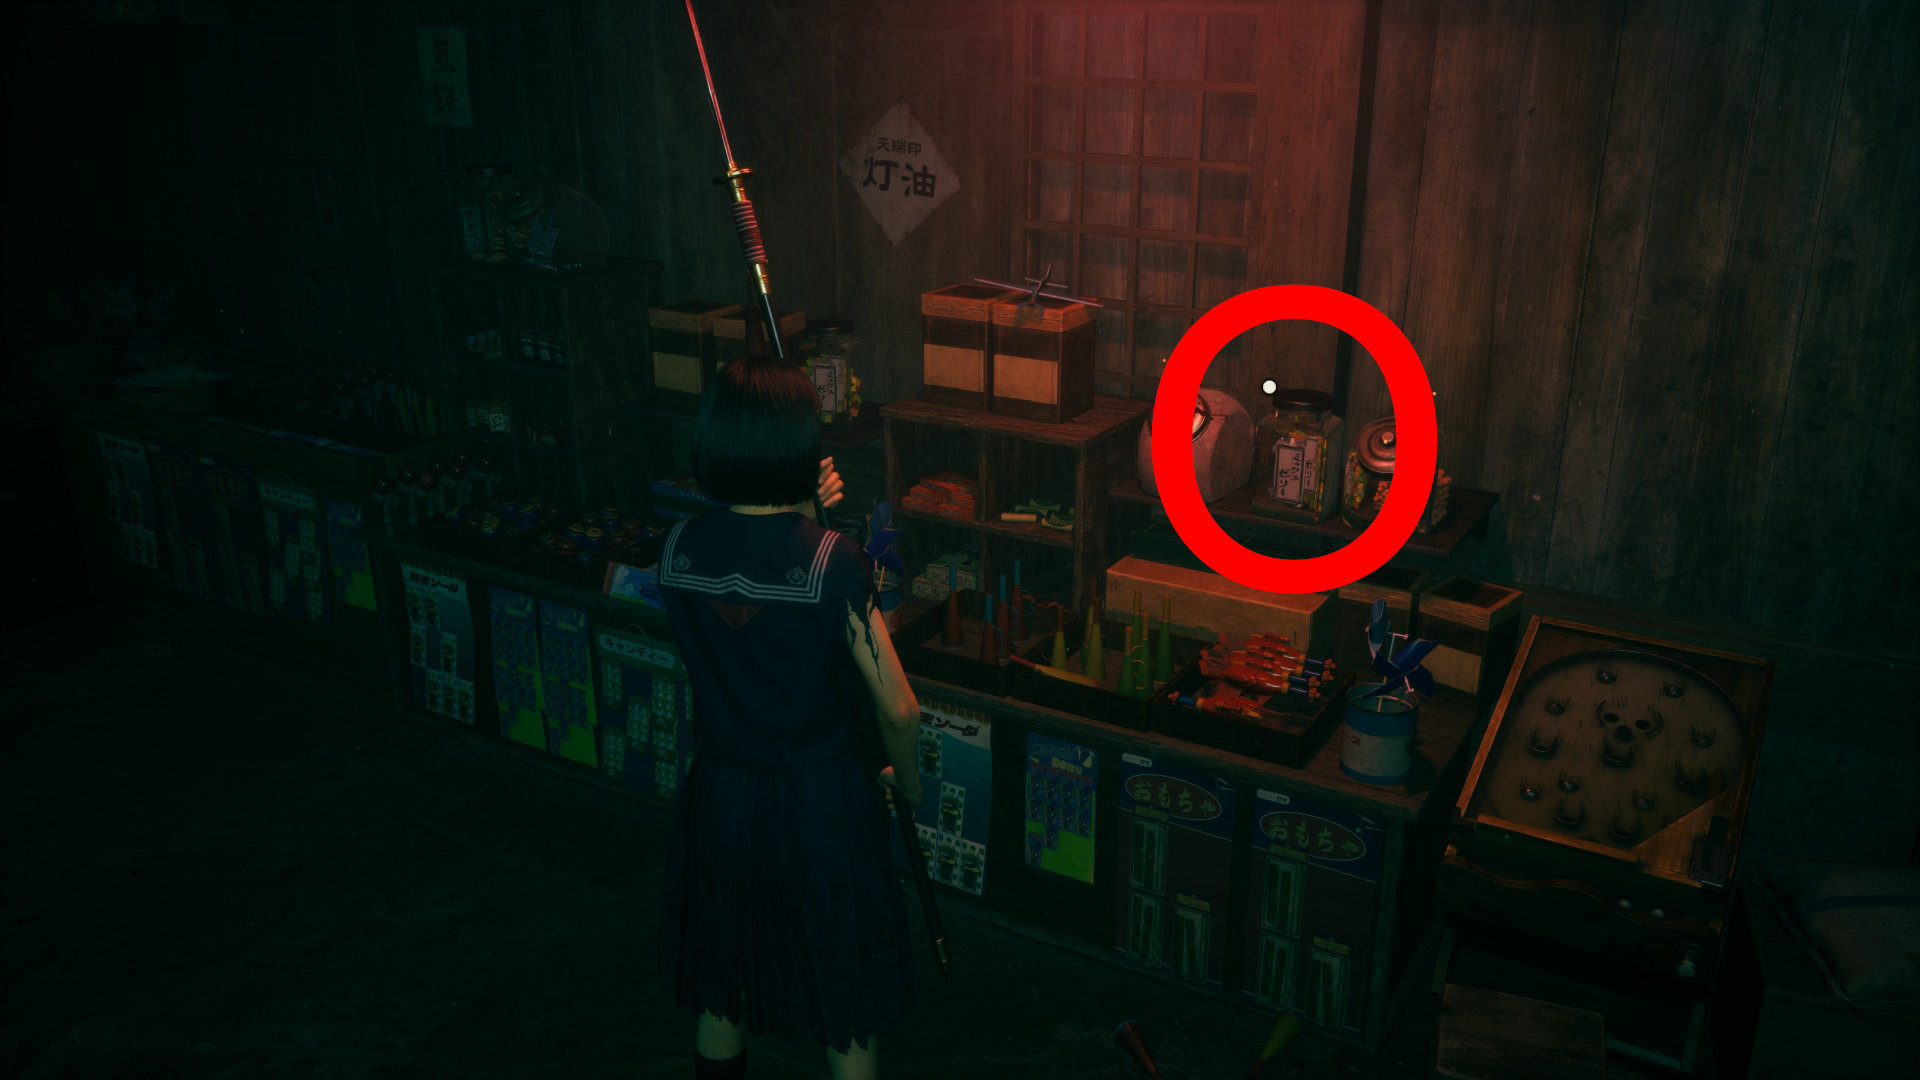
- Candy jars in the general store
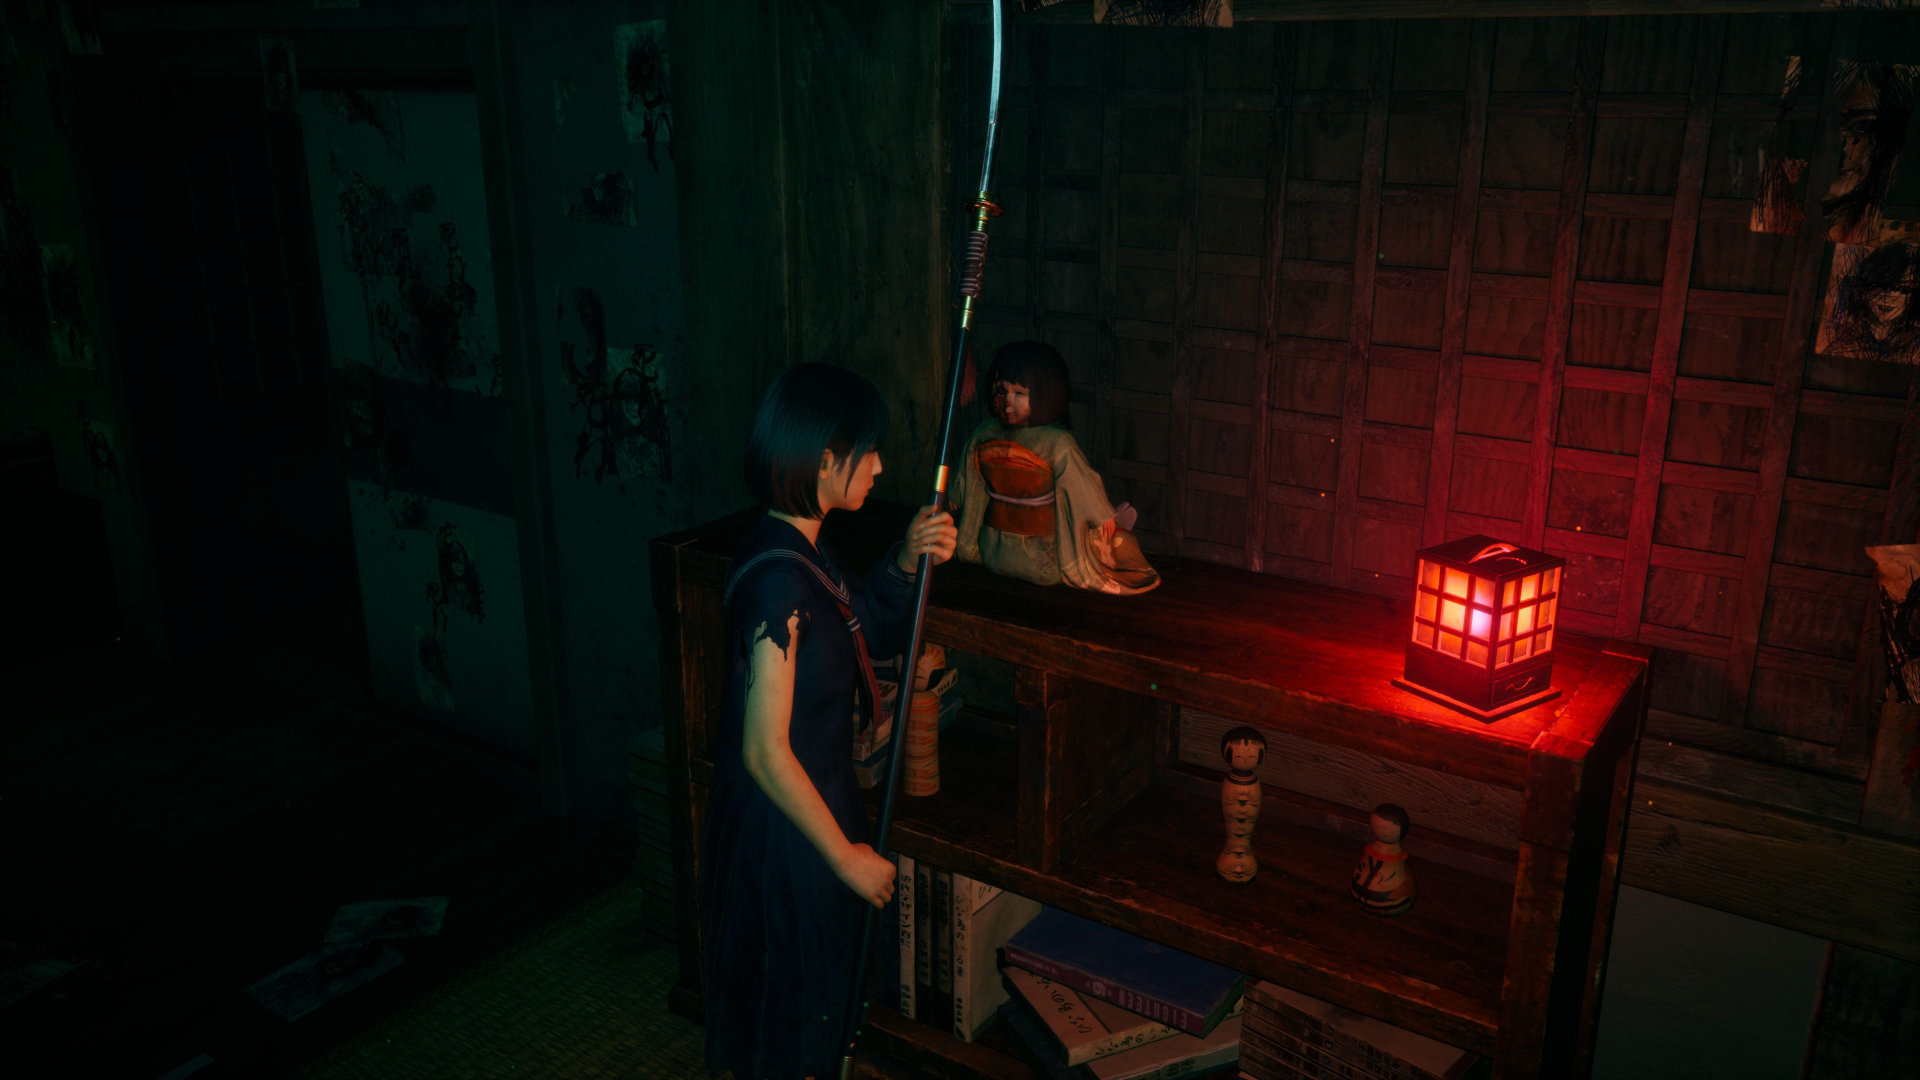
- Doll in a blue kimono in Rinko’s room
- Desk in the classroom (appears after you turn on the lamp)
Place all three crests into the device to receive the Triple Scale Crest Key.

Solve the light puzzle for Sakuko
At the end of the second section, you’ll find Sakuko trapped in a cage. On the altar in front of her lies a note with a clue for the light puzzle:
“Two opposing halves must pray for the well-being of the other. As tradition demands, the opposites must remain at the same height, as if looking into a mirror. Then cover the light to bury the past in darkness.”
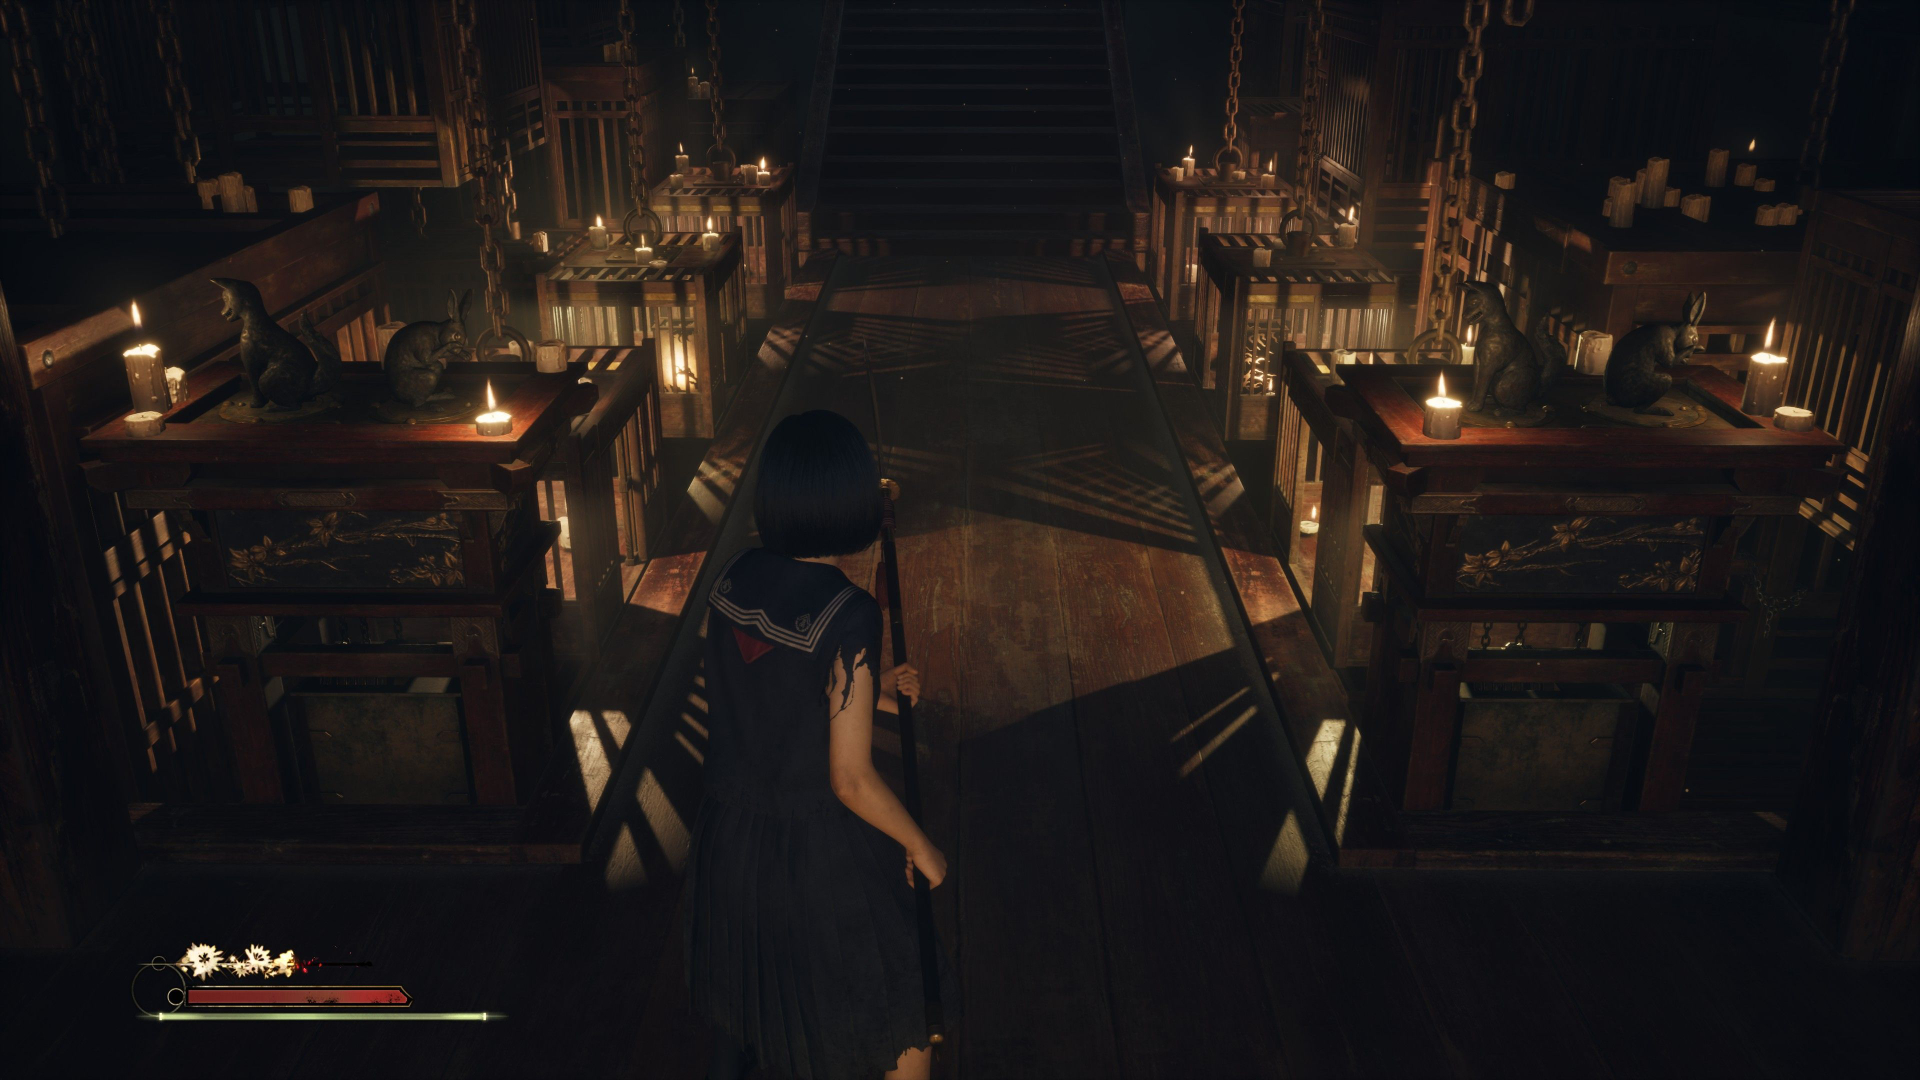
The note includes a drawing of a fox and a rabbit statue. Turn around and you’ll see these exact statues in duplicate, one pair to your left and one to your right. Interacting with a statue rotates it, raising or lowering two cages behind it. Your goal is to align all cages at the same height. Since some cages are affected by two statues at once, you’ll need to experiment a bit.
Once all the cages are level, you can retrieve the Restrain Lamp Shade from the middle cage on the left. In the opposite cage lies the Talon Lamp Shade. Use them to cover the two lamps on either side of the altar, and the White Rabbit Emblem Key will appear.
Find Shu’s most prized possessions
You’ll come to a hall displaying Shu’s most treasured belongings on six pedestals – but two are missing. Start by picking up the note with a clue on the shelf in the front left corner:
“Do not carry memories of what has happened beyond this point. Place everything on the pedestal first. The door will not open to those whose hearts are heavy with regret.”
Continue through the door on the left into the corridor. Again, you’ll need to open rooms using the color-coded mechanisms. At the end of the northeastern corridor, you’ll find the first possession on a shelf: a drawing of Hinako.
On the opposite side of Shu’s hall, you’ll face a small boss fight in another chamber. Afterward, head upstairs, keep to the right, and at the far end collect the second possession, a manga, from the railing. Place both items on the empty pedestals to complete the “Farewell Ceremony.”