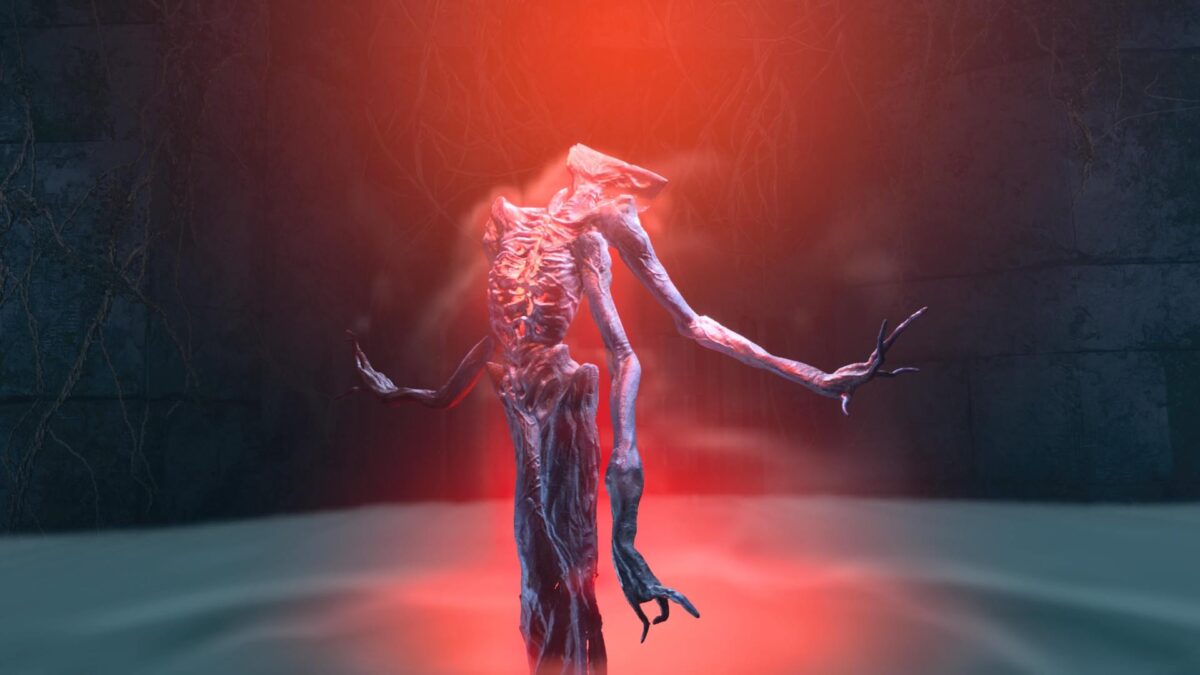
In this Returnal Guide we will give you tips and tools for Enemies, Weapons, Artifacts and Items in the first biome. You’ll also learn how to defeat the Boss Phrike.
In this Returnal Guide you will learn:
- How to defeat all enemies in the first biome
- Which are the most powerful weapons
- Which Artifacts you should be looking for
- Which Items will protect you most effectively
- how to defeat the Boss Phrike
Returnal is a hard-hitting game. If you go into the PS5-exclusive Rogue Lite with a casual mindset, you’ll probably already fall into despair in the very first biome. To avoid that, we’ve put together a guide for “the overgrown ruins”. Here you will find tips regarding Weapons, Artifacts, Items and Monsters. Of course, we will also show you how to defeat the first boss, “Phrike”.
The Overgrown Ruins: Special Areas
The overgrown ruins are a very gloomy area with many locked places. You’ll receive some important equipment and learn a lot about the history of the planet Atropos in this first biome. Exploring the ruins is also still worthwhile in the later course of the game.
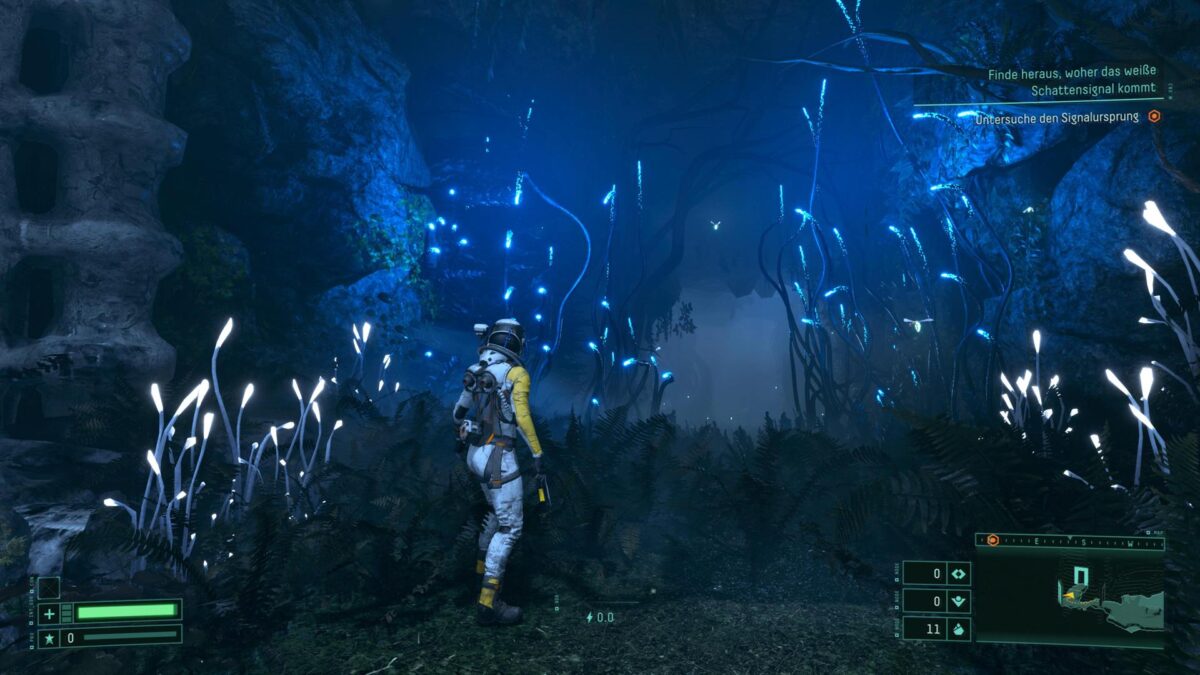
There will be some areas which can only be reached once you have the appropriate Xenotech. Vines and vegetation at passageways, for example, can only be removed with the Atropian Blade. You can find it at the Red Gate, which is also the passage to the second biome. Boss Phrike carries the key with him.
Usually, you’ll have to deal with several waves of enemies in the arenas. Kerberons often make the start, followed by Strixeras or Lamiadons. Try to kill as many of the smaller enemies as possible before the Titanops or Mycomorphs join the party. For tips on combat, have a look at the respective chapters below and our Returnal Tips Guide.
Crash Site, Helios and Cthonos
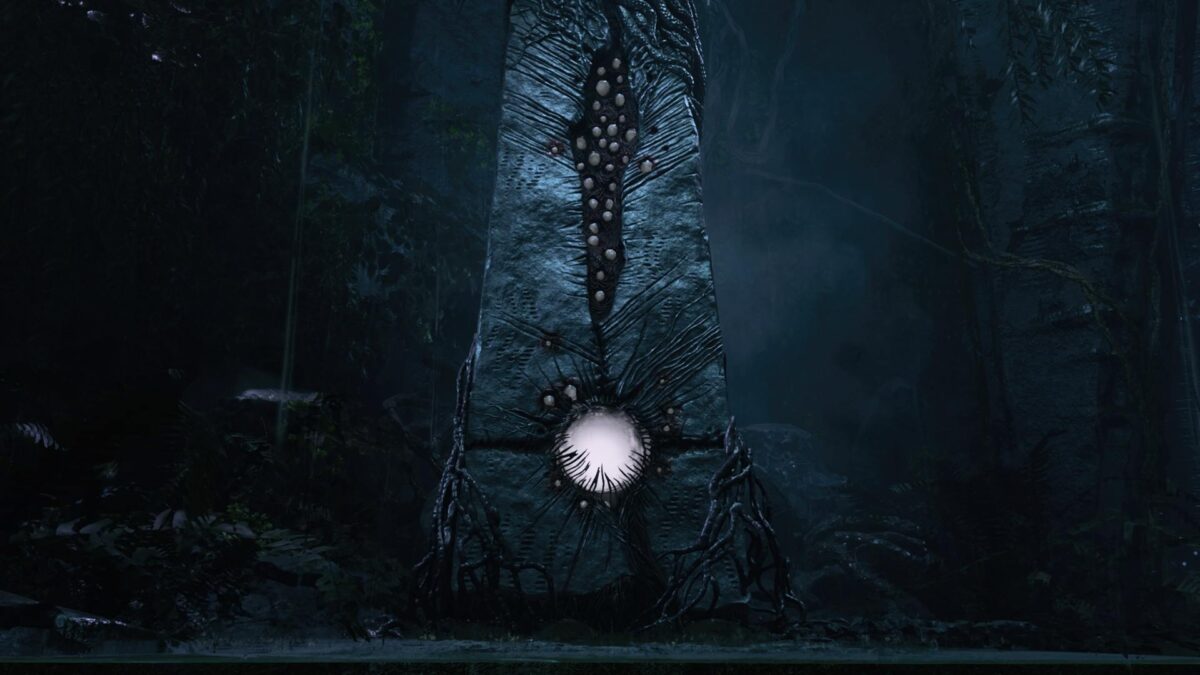
The game starts at the crash site of Selene’s spaceship – to which you’ll return to every time you die. Next to the gate that leads to the next section stands the stone Cthonos. You can feed it with the resource Ether after your first death and in return, you will receive a new, previously unavailable item.
Selen wakes up in her spaceship Helios after she dies for the first time. You can access the ship’s log and daily challenges via the control consoles. You’ll unlock documents containing messages exchanged between Selene and her Astra team over the course of the game, which you can read here.
Furthermore, you can check the overview for comprehensive game statistics, such as the number of explored areas, how many enemies you have eliminated in total, or how many times Selene has died so far.
- Tip: Take a seat on Selene’s pilot’s chair and look out of the window as soon as the option becomes available.
These are the Daily Challenges
The daily challenges let you compete with other players. The goal is to complete a certain biome and collect as many points as possible. The more enemies you eliminate in a row, the higher your point multiplier will be. In addition, you can activate challenge modifiers.
In each round, you’ll be equipped with two different advantages and disadvantages, and you’ll also receive a special weapon. You can see your placement on a leaderboard. You only have one attempt for each challenge. If you manage to complete a biome, you’ll receive five units of Ether.
Selene’s House – A Breath of Psycho Thriller
At some point towards the end of the first biome, you will be standing in front of Selene’s house. If the lights are off, it means that the house is locked. However, you’ll discover the key shortly after your first visit to the house. Inside, the game switches to the first-person perspective and becomes a playable psychological thriller for a short time. You learn more about Selene and her past and get a new Artifact after each visit. Always drop by the house and enter it when the lights are on.
All enemies in the Overgrown Ruins and how to defeat them
There are a total of ten different enemy types in the first biome of Returnal. That includes stationary machinery, ground and airborne monsters, and special creatures with extraordinary powers.
Kerberon: The Lizard Monster
Not long after you find the first weapon in the Overgrown Ruins, you’ll have to deal with the Kerberons. These lizard-like creatures usually attack in packs. Keep an eye on your surroundings.
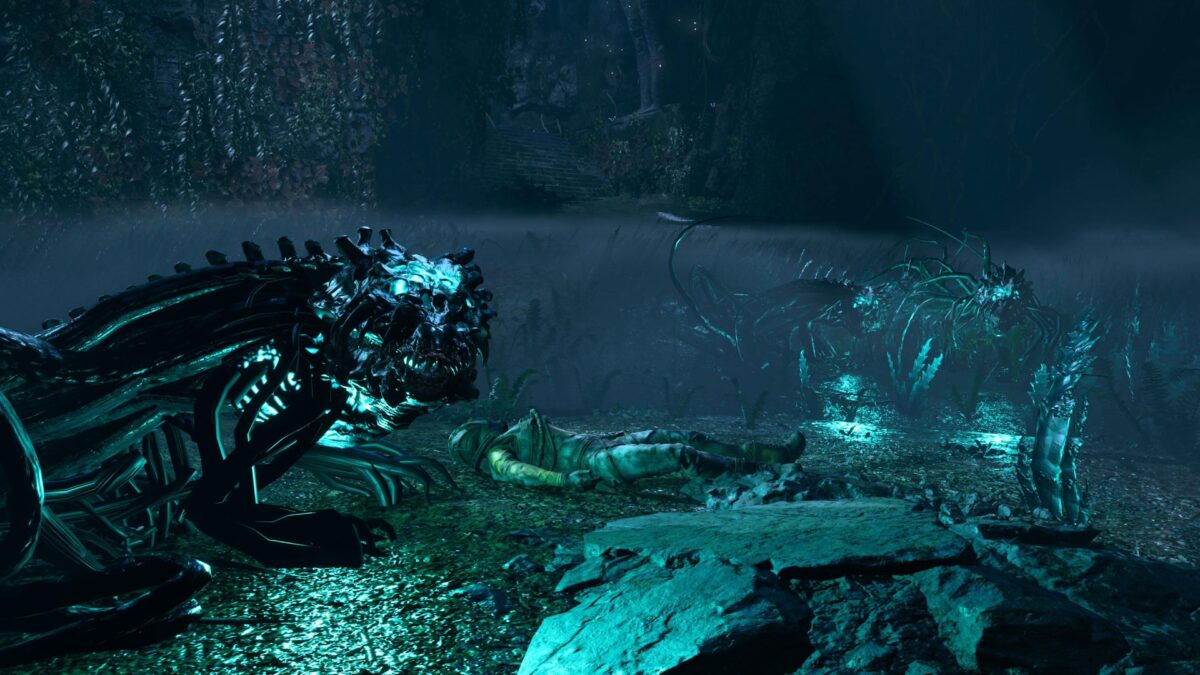
The Kerberons can climb up to higher platforms. Don’t feel too safe up there. They use jaws and claws in close combat. However, their primary attack is spitting green energy orbs in a horizontal line. The distances between the orbs are usually large enough to pass between them.
Open fire from afar and jump over the energy balls whenever necessary. Kerberons are dangerous when they are attacking as a pack or at close range. However, the Atropian Blade is a good weapon for melee combat. It can kill a Kerberon with just one strike.
Malformed Kerberonyx: The mutated specimen
Malformed monsters are mutated variants of standard enemies which are common to the respective biome. You will rarely encounter the malformed Kerberonyx in the overgrown ruins, but get ready for a difficult fight when you do – especially in the early stages of the game. You’ll encounter it mostly in secret chambers. It uses its paws to attack in confined spaces and it also spits red energy orbs.
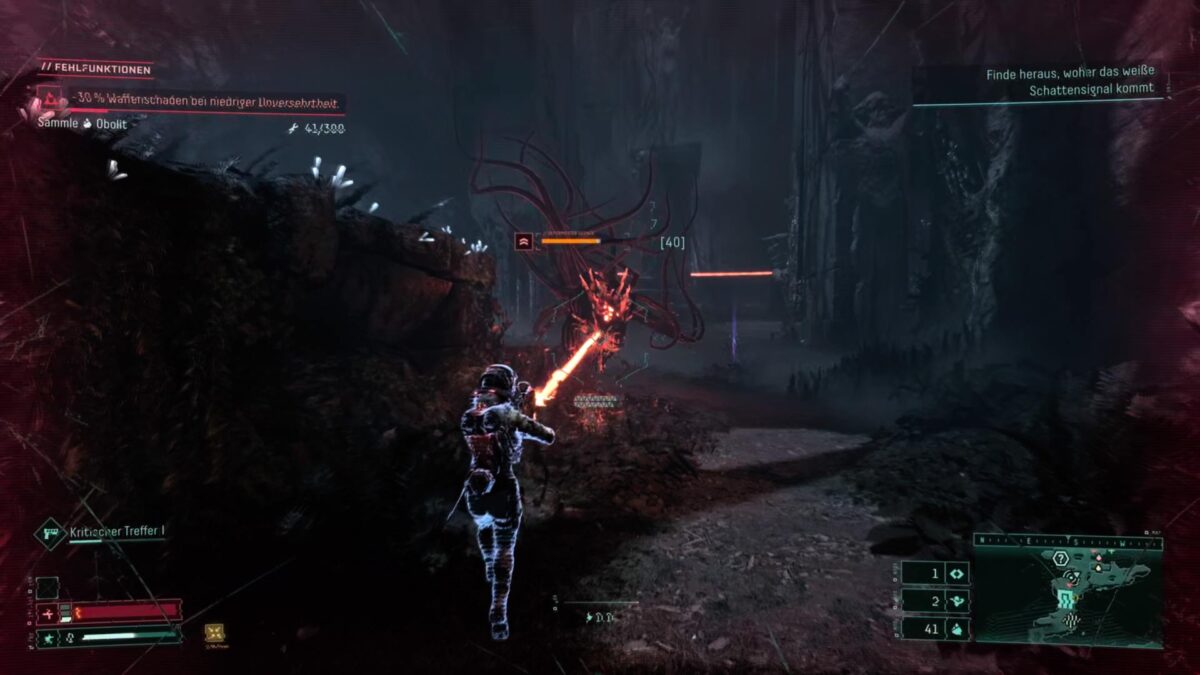
In contrast to the ordinary Kerberon, though, the projectiles look like a dragon’s firebreathing. In addition to projectiles, the malformed Kerberonyx is capable of emitting red energy rings, which it can stack up to three times. Try to pierce through them with the dash, but be careful to not get too close to the monster while doing so. Use the dash to dodge the projectiles.
Slide left or right, jump up and activate dash again to move in the opposite direction. The chamber is often filled with large pillars that can be used as cover. But be careful: some of them are destructible and won’t withstand projectiles for long. Wait for the Kerberonyx to fire its bursts and shoot from cover afterward. Stay patient and don’t engage in close combat until you have significantly increased Selene’s Proficiency level and Integrity.
Atropian Turret
Atropian Turrets are only vulnerable once they notice you and extend out of the ground. They fire triple bursts of red energy balls in short intervals. Take cover when they emerge from the ground and wait for the breaks between the fire bursts to attack.
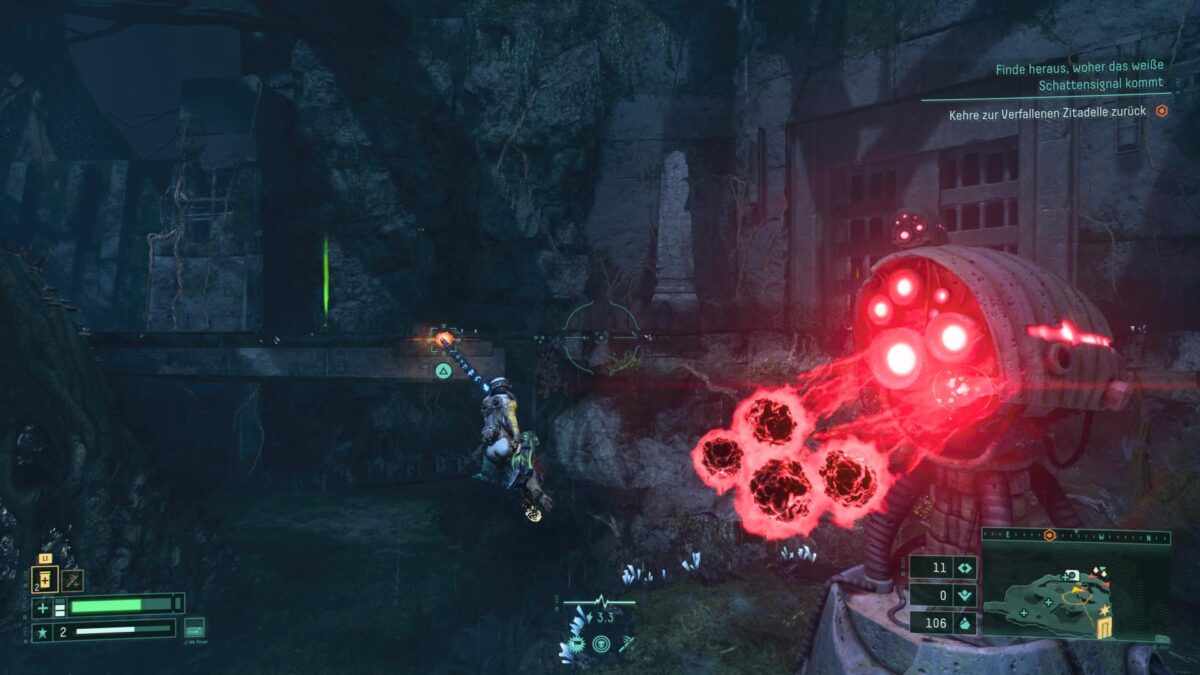
Sometimes the turrets are covered by a red shield. You can pierce it only with the Atropian Blade. Move towards the turret in a zigzag, jump occasionally, and use the dash if a projectile gets too close. One strike with the blade will destroy the turret.
Strixera: The Killer Moths
Strixera is a flying creature that prefers to attack from a distance. Similar to the Kerberon, this winged monster attacks mostly in groups and spits green energy balls. It emits them at a 45-degree angle. Try to stay centrally in front of the attacking Strixera and shoot it from there.
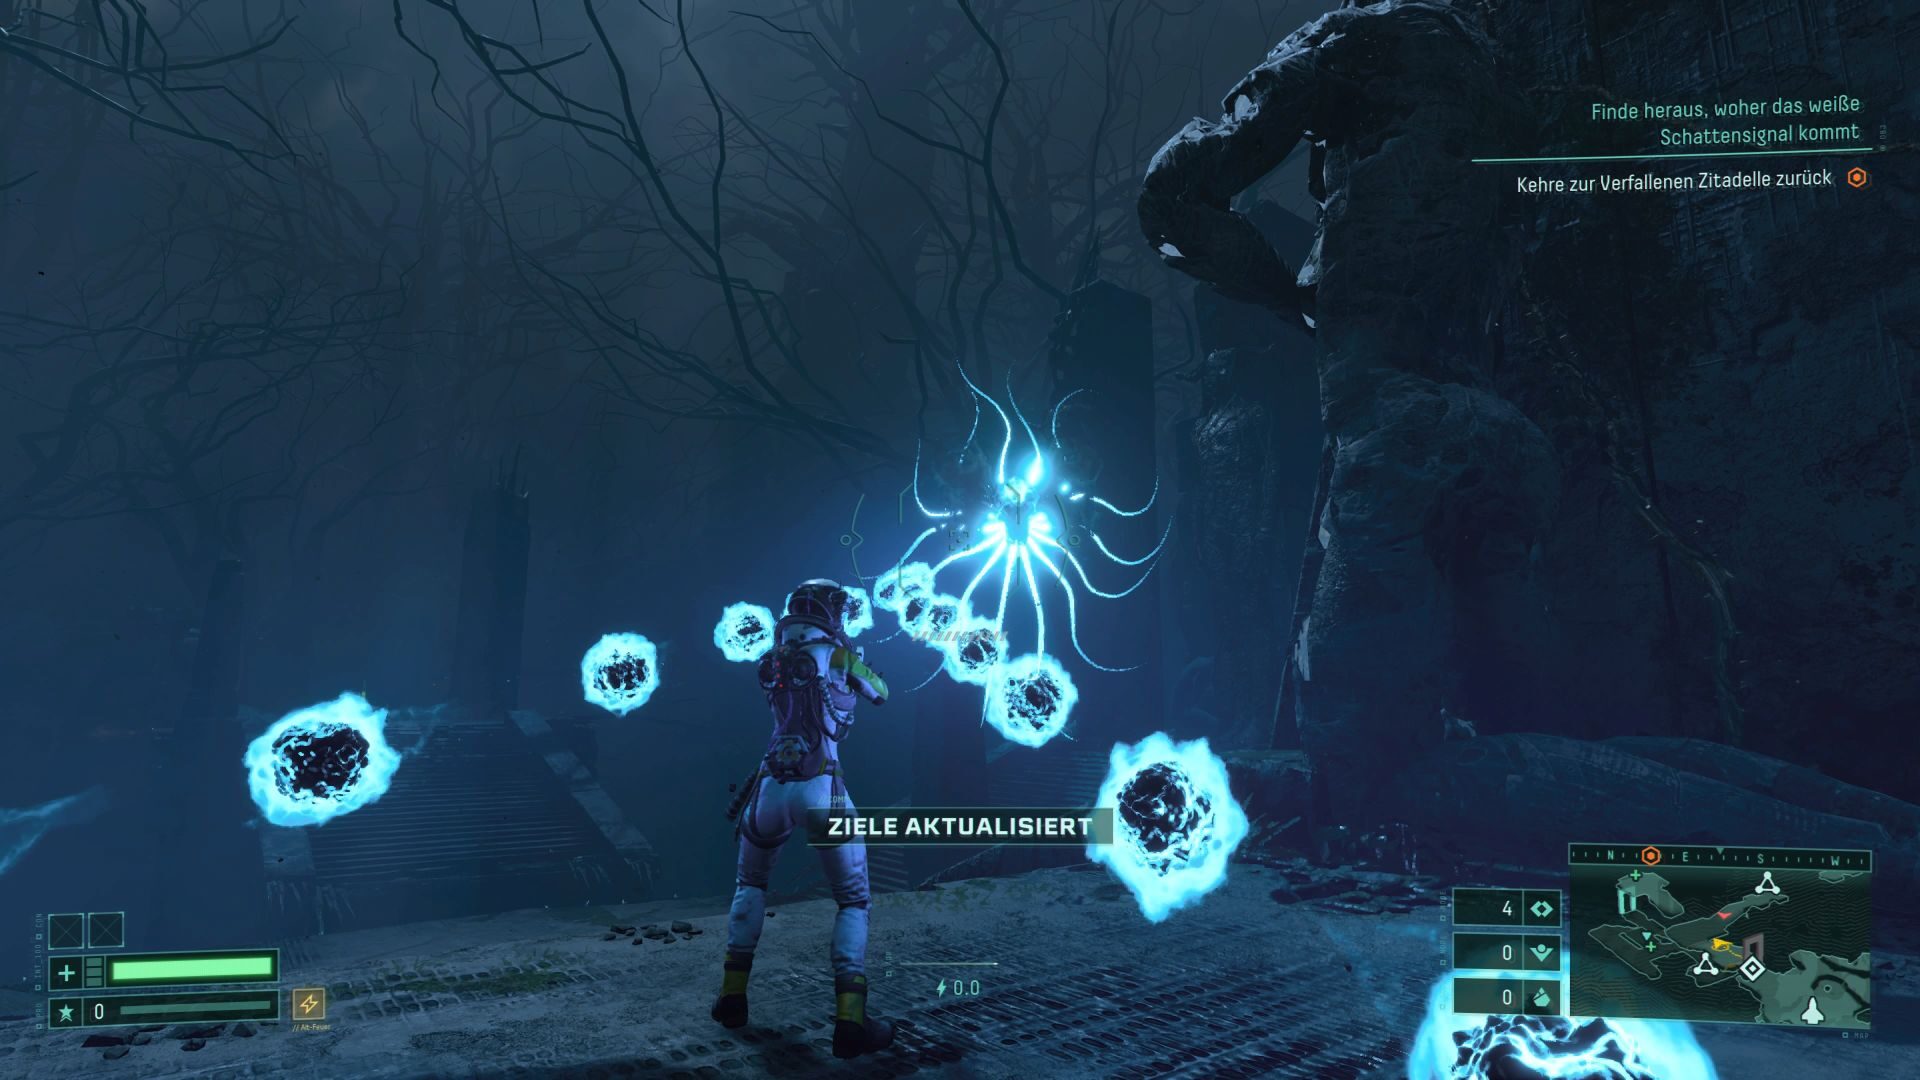
Individual Strixeras flying in a swarm launch a targeted beam attack. When a yellow ray shines at you, shoot the perpetrator instantly to stagger them. Once the attack is fully charged, you will barely be able to dodge it.
Titanops: Tentacles from hell
The Titanops is the strongest enemy in the first biome, aside from the malformed Kerberonyx. These giant tentacled creatures appear in arenas and usually come in pairs. They spit orange energy balls in a machine gun like fashion, moving horizontally from right to left.
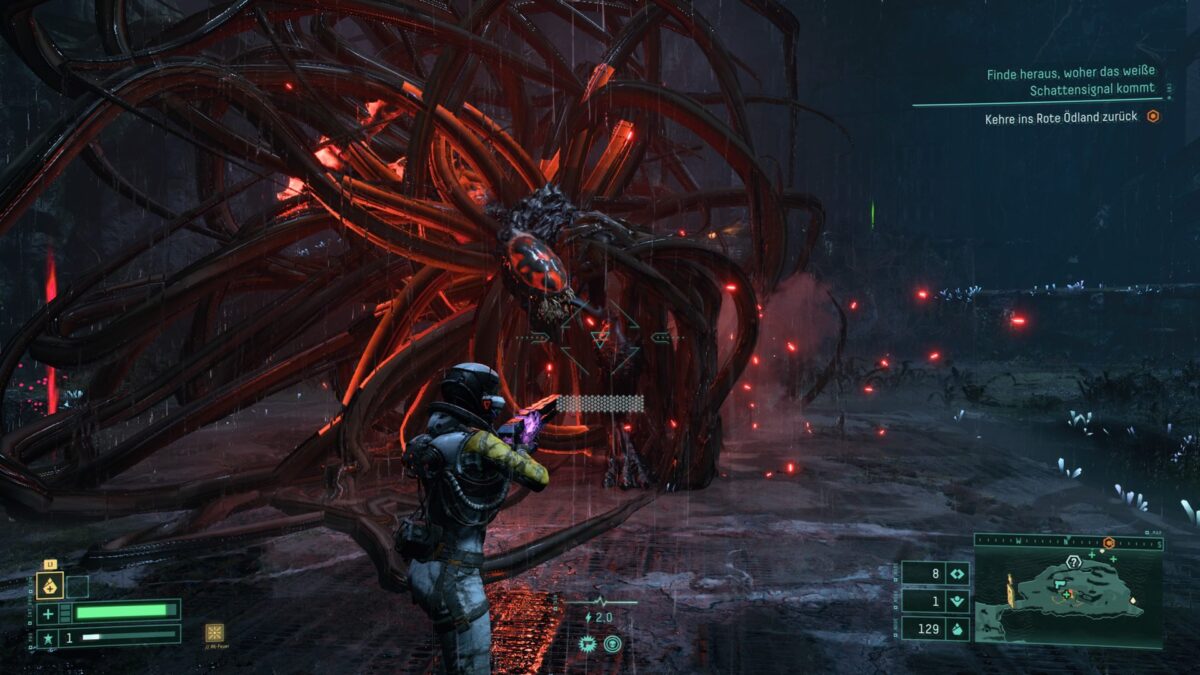
Glide through the projectiles with the dash and jump into the air right after to avoid them. Keep your distance and take cover behind statues or rocks. Fire occasionally from cover, but switch again quickly. If you stay in the same spot for too long, the Titanops will come after you with a powerful jump attack.
Dodge via dash to the side shortly before the monster hits the ground. Engage in close combat with the Atropian Blade right after it has landed. The first blow staggers the Titanops. Quickly alternate between strikes and dashes until the monster dies. The Titanops can take about four melee hits.
Mycomorph: The Teleporting Poisonous Mushroom
You will meet the Mycomorph primarily in the arenas of the first biome. The mushroom-like giant spits acid and throws homing spores. It can also emit a sticky mass that slows you down. Dodge the projectiles by dashing to the side and open fire afterward immediately. Keep moving and pay attention to the mini-map.
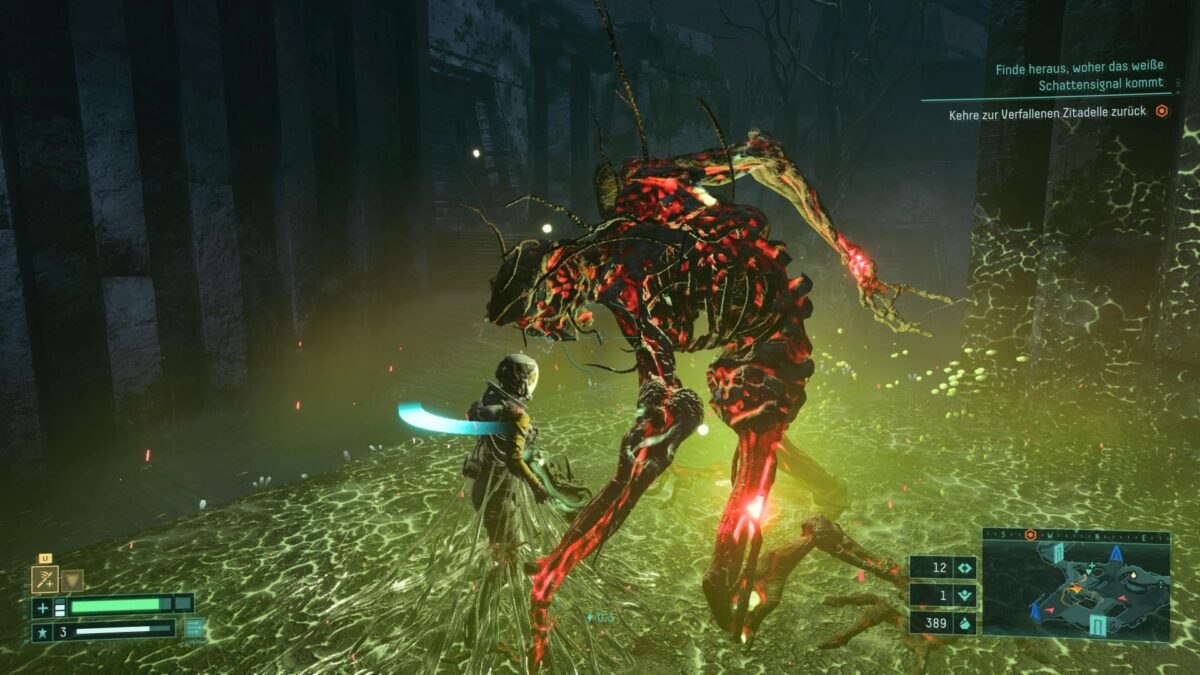
Should the Mycomorph suddenly disappear, place your back against the wall if possible. The Mykomorph likes to teleport behind its opponents. The Mykomorph is hopelessly outmatched in close combat. Sprint towards the monster with your Atropian Blade equipped and strike it with a blow. The monster drops to its knees and can no longer move. Two more blows will finish him off.
Lamiadon: The Atropian Mosquito
The second flying creature in the first biome is the Lamiadon. Unlike the Strixera, the Lamiadon flies a bit lower and loves close combat. The creatures always appear in swarms, but they do not fire projectiles.
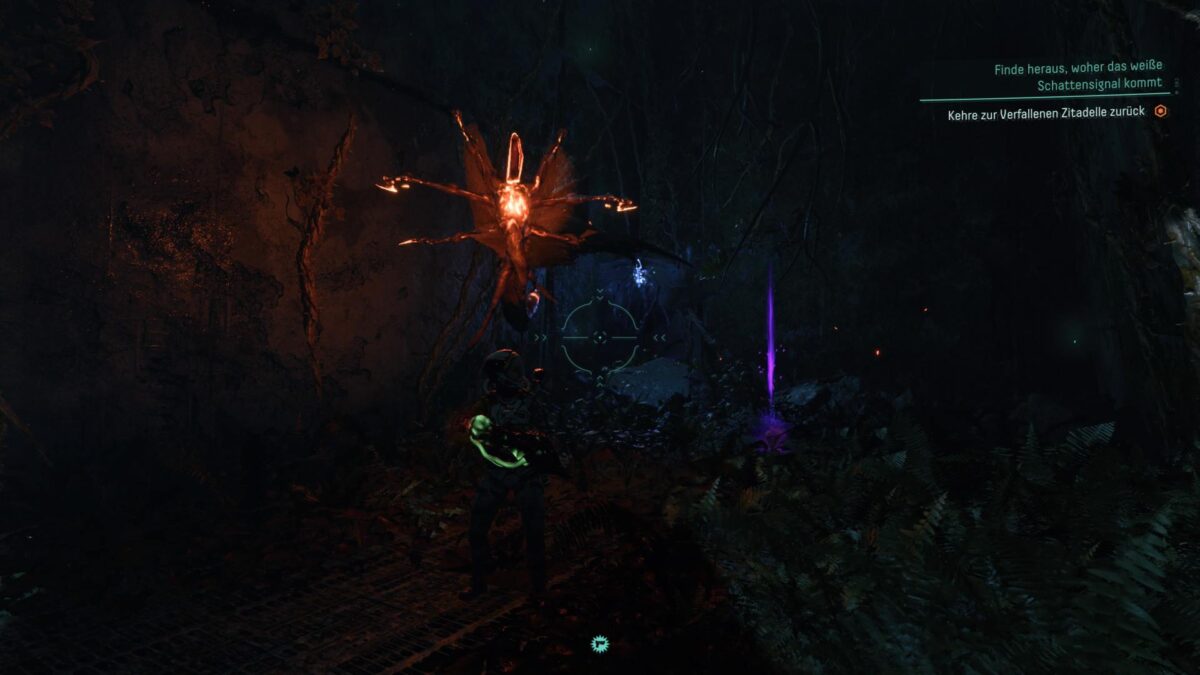
They will charge up instead and launch a melee attack at you at lightning speed. Once a Lamiadon flickers yellow and begins to tremble, you should either kill it or run away quickly. Keep them at a distance, and they will be quite harmless. Once the swarm has surrounded you, jump into the air and lash out with the Atropian Blade. One hit is enough to kill Lamiadons.
Non-lethal Creatures
There are a total of three enemies in the overgrown ruins that do not attack you directly. The broken Tripod has no functioning weapon systems. Kill it to pick up some Obolite.
Chrysoids provide a much greater amount of this valuable resource. The luminous tentacled creatures appear in swarms and on side paths. Try to kill as many as possible. The creatures release large amounts of Obolite, do not attack, but disappear quickly underground.
The Proteron also lacks a weapon system, but is nevertheless very dangerous. This obelisk emits green rays that heal all monsters in the area instantly, making them basically invincible. Whenever you see a green glow in a section, you’ll have to locate the source of it and destroy it.
Returnal Weapons Guide: These are the Weapons you will find in the first biome
Not long after leaving the crash site, Selene will find her sidearm. It will remain in your inventory no matter how many times you die. However, the standard version of the sidearm is not powerful. Luckily, the Overgrown Ruins have some very useful guns in store for you.
SD-M8 – Modified Sidearm
The modified version of Selene’s pistol can still be very useful later on. The continuous rate of fire is relatively slow, but if you have a quick trigger finger, you can achieve a fast rate of fire. The SD-M8 is suited for long and short distances. The version of the SD-M8 with the alternative fire “Trackerswarm” and the feature “Homing Missile”, turns out to be the ideal tool for the first two boss fights.
Tachyomatic Carbine
This mechanical Xenotype Weapon resembles a Machine Gun. Just like the SD-M8, it can be used at short and long ranges. However, it achieves significantly higher rates of fire. Add in some bonus damage and the “Rising Pitch” trait, and you’ll mow down just about anything that crosses your path in the overgrown ruins.
Spitmaw Blaster
The Spitmaw Blaster is the Returnal equivalent of a shotgun. This semi-automatic bio-engineered weapon is very effective at close range and can stagger enemies. If you like to engage in hand-to-hand combat with the Atropian Blade, the Spitmaw Blaster makes for an ideal addition. The bio-shotgun is less suitable for long-range attacks, though.
The most important Artifacts, Items and Parasites in the Overgrown Ruins
In the following overview, you can see all the important Artifacts, Consumables, and Parasites that you can find for the first time in the overgrown ruins.
Overview of all Returnal Artifacts
Search for calibrators to increase Selene’s Proficiency levels. The “Emergency Repairs” suit Artifact is also extremely useful. When Selene’s Integrity comes to an end, the Artifact will intervene and repair the suit automatically.
After the first visit to Selene’s house, you’ll receive a new personal item. This Artifact is one of the most important ones: the “Astronaut Figurine”. It grants you a bonus life. If you die, the astronaut will revive you right on the spot. You won’t lose any equipment or progress.
Overview of all Returnal Consumables
The repair consumables “Silphium Vial” and the “Repair Enhancer” are particularly useful. The latter doubles the repair efficiency by fifty percent. Use it when you are at low health and right before you consume Silphium.
Overview of all Parasites
You will find about ten different Parasites in the first biome. The “Oily Rotnose” is very useful. This little pest repairs Selene’s suit when her Integrity drops to a low level. However, if you trigger a malfunction while wearing the Rotnose, repairing the suit will become harder. This risk is easy to manage, though, since you’ll only have to stay away from malignant items and containers.
- Tip: Rare purple plants grow in the overgrown ruins. These plants squeak when touched. They often drop Parasites, malignant Resin, or Obolite.
Boss fight in Returnal: What you need to prepare
Familiarize yourself with your weapon before entering Phrike’s arena. Count how many shots you hear until the magazine runs dry. You won’t be able to focus on the indicator during the fight. Furthermore, you should learn the rhythm in which you have to press the fire button to activate Overload.
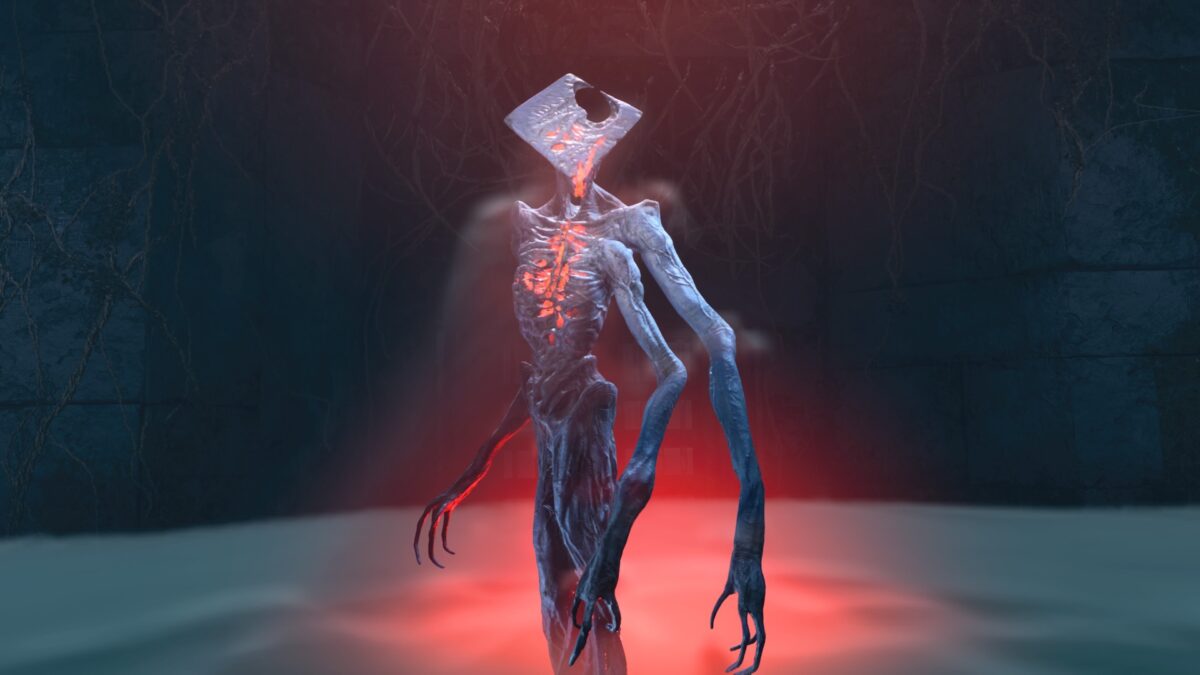
Once you have mastered the weapon, you can keep your finger on the trigger and you’ll automatically notice when the magazine is empty. This way you can focus more on the incoming projectiles and perform evasive maneuvers. You should have at least a Proficiency level of two for the fight and have increased the Integrity to at least 120 percent. A vial of Silphium in your luggage certainly won’t do any harm either.
Most effective Weapon: Modified Sidearm SD-M8
- Proficiency level 2
- Increased Bonus damage
- Alt-Fire „Trackerswarm“
- Homing Missile
Alternative Weapon: Tachyomatic Carbine
- Alt-Fire „Trackerswarm“
- Increased Bonus Damage
Unsuitable Weapon: Spitmaw Blaster
Phrike: How to defeat the first boss in Returnal
Round 1
Phrike starts the fight with target-seeking red energy shrapnel. Move quickly to the right or left. Dash through when they approach you. After that, the behemoth releases a swarm of yellow energy spheres which slowly descend from above, covering the entire area. Try to get into the gaps between the spheres and save some dash energy to avoid the following bursts of purple energy spheres.
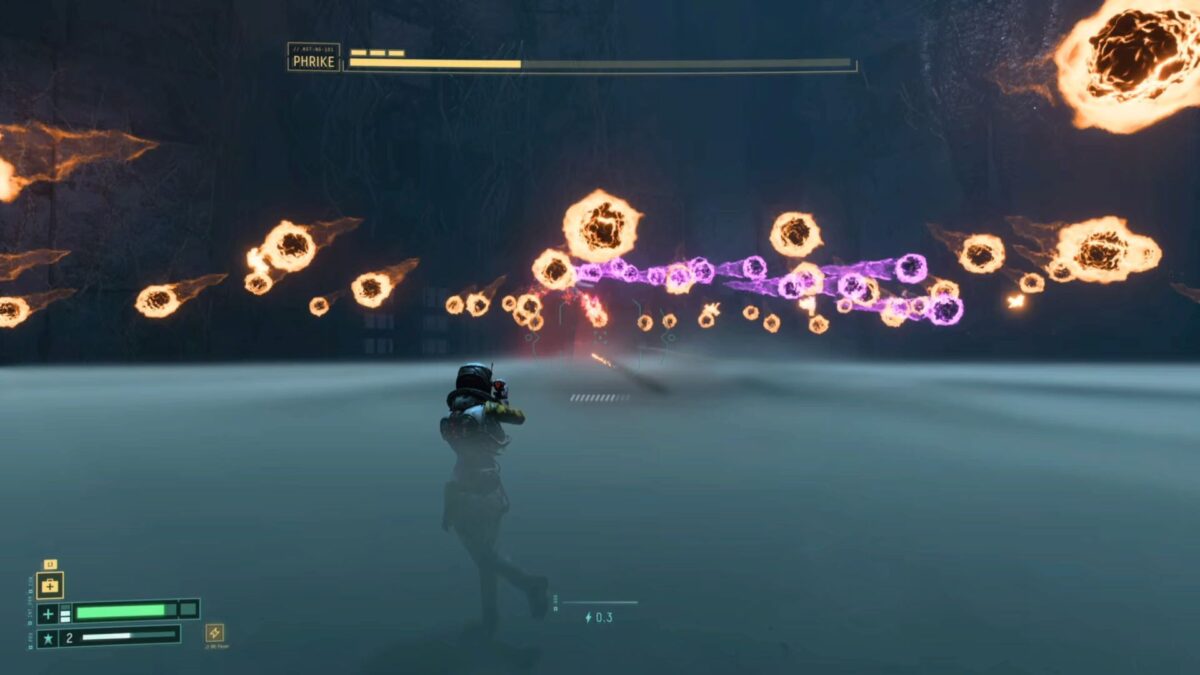
Phrike can shoot a laser beam from his eyes – get ready for it whenever his face lights up. Dodge the laser beam. During the first round, he maneuvers the beam in a straight line from the bottom to the top. Shortly before reaching the end of the first life bar, Phrike will teleport to the other side of the arena and attack you instantly with homing energy projectiles again.
Round 2
Phrike increases the number of strikes. He changes attack types faster and even combines some attacks. He also moves around the arena and swings his four arms in close combat. Dodge via dashing as soon as he lunges. A red, slowly expanding laser ring is added to his arsenal in this round.
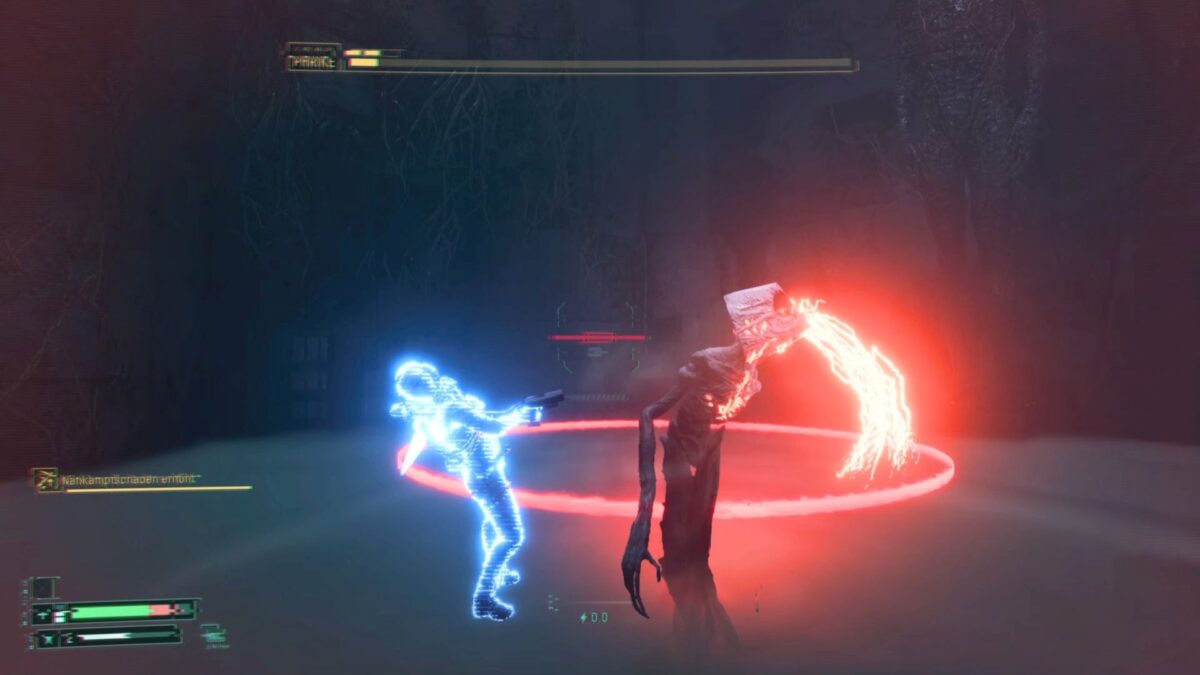
Jump over it or slide through unharmed by using dash at the right moment. He moves the red laser beam horizontally through the room from now on. Attention: Phrike will attack you with a melee attack or a laser attack after he releases the yellow energy ball swarm – so you’ll have to deal with these attacks while the projectiles are still sinking through the air.
Round 3
During the last section, Phrike will be attacking more with quick melee attacks. He spreads the yellow energy balls across the ground like a carpet, while shooting the red energy shrapnel high into the air.
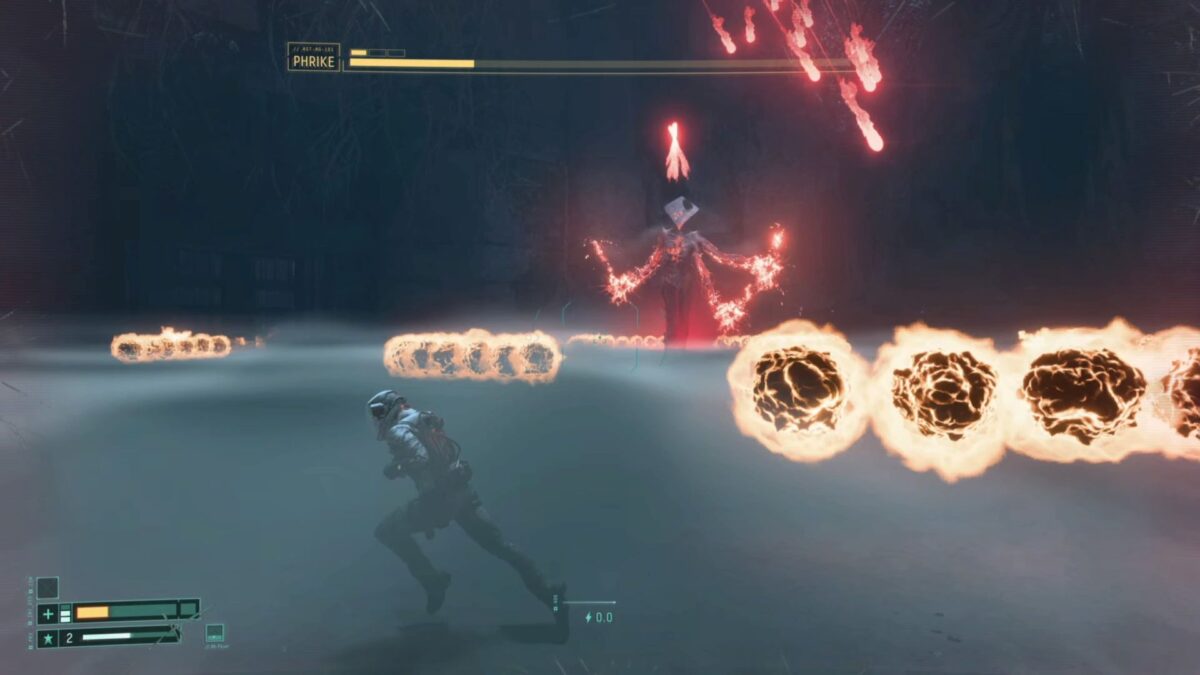
He teleports to the opposite side and attacks you with melee attacks while they glide down. He clusters the yellow shower of bullets and releases the laser ring twice in a row. Jump over the first ring and use the dash if you can’t get over the second ring with one jump.
All Guides & Articles about Returnal
Translation by: Dennis Anjuschin
No related articles found.

