

Three secret cabinets with tricky puzzles await you in the Care Center of Resident Evil Requiem. We’ll show you all combinations and how to obtain the important Quartz pieces.
While escaping the Care Center in Resident Evil Requiem, you’ll come across three locked secret cabinets blocking your way. To open them, you must figure out the correct combination in each case. Only then will you obtain the three Quartz pieces (Sun, Moon, Star) needed to open the door to the main entrance. In this walkthrough, we guide you step by step through all three puzzles, list the required items, and reveal the correct combinations.
- Spoiler Warning: This guide contains no story spoilers, but we naturally have to mention locations in order to explain the puzzle solutions.
Find the Moon Quartz: Open the Secret Cabinet in the Chairman’s Office
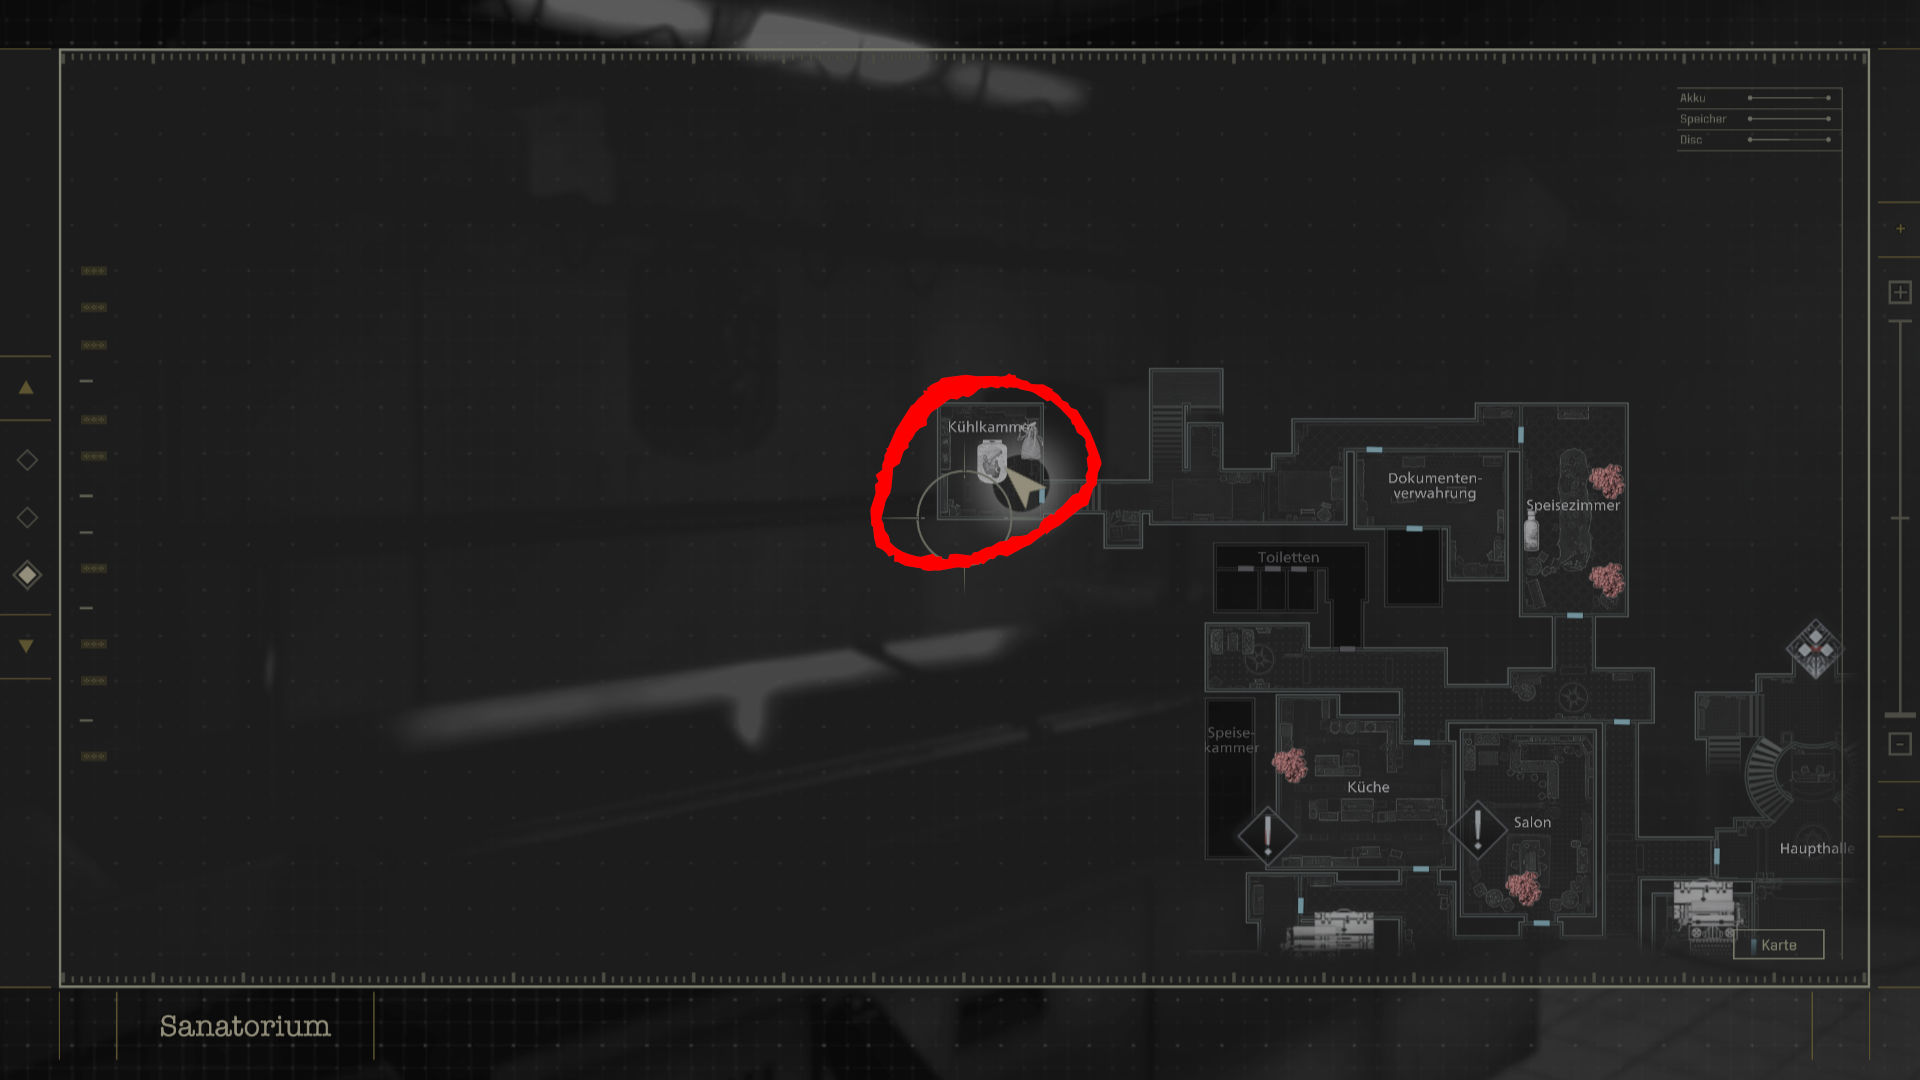
After the first encounter with Leon, you must escape the Care Center with Grace. Once you’ve found the keycard for the West Wing and reached the first floor via the access point in the kitchen, you’ll arrive at the Chairman’s Office.
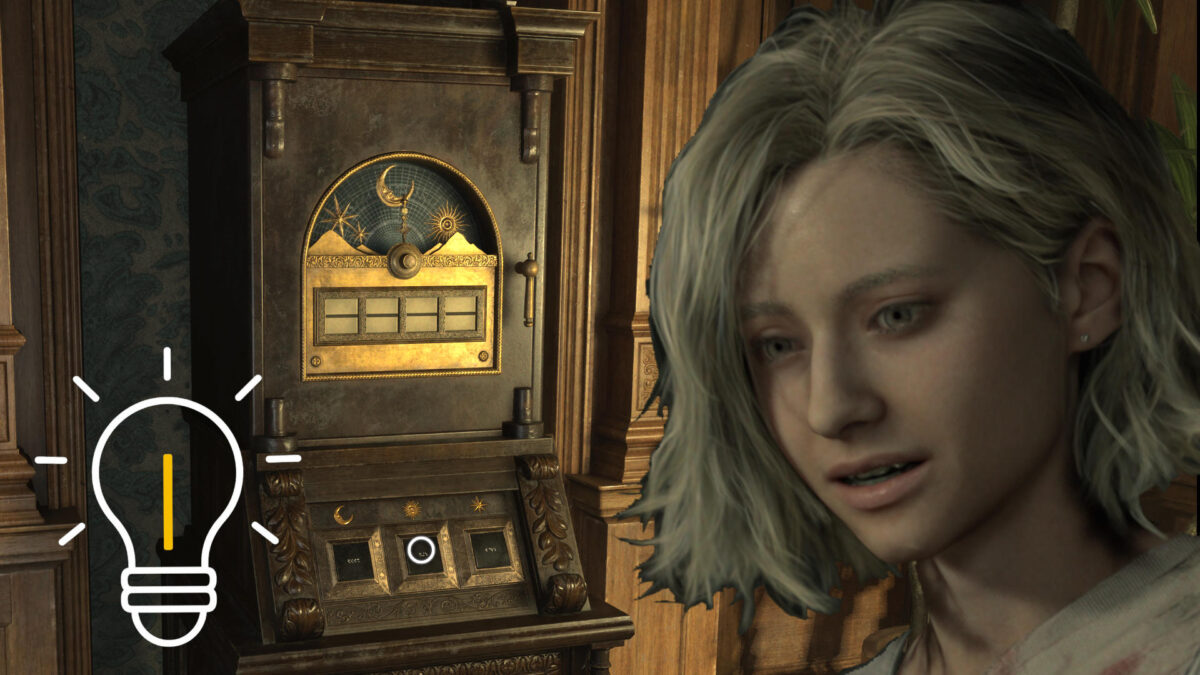
Inside, you’ll see a secret cabinet that can be opened with the correct combination of symbols.
To determine the correct order of symbols, examine the desk in the anteroom. There’s a notebook with a torn-out page lying on it. To read the note, you’ll need a pencil.
Follow the noises into the office. Behind the desk, you’ll see a zombie strangling a corpse. Take out the unpleasant man in the suit and grab the pencil from the desk.
Now return to the notebook and shade over the blank page. The combination for the secret cabinet will slowly appear:
- Moon, Sun, Star, Moon
Go to the secret cabinet and enter the symbols in the correct order. The door opens and reveals the “Moon Quartz”, a cube decorated with a moon. Afterward, walk through the remaining rooms until you reach the East Wing.
Find the Sun Quartz: Open the Secret Cabinet in the Lead Researcher’s Office
Once you gain access to the East Wing, pass through the laboratories and take the stairs to the first floor. There you’ll find the Lead Researcher’s Office, but you must get past two infected enemies waiting at the top of the stairs. It’s best to lure them downstairs and lose them on the ground floor before heading back up. In the office behind the desk, there’s another secret cabinet — this one secured with a lock.
Return to the hallway and take the door on the left into the conference room. Before you can pick up the ID Wristband Lv. 1 from the corpse, you’ll be interrupted by another visitor, whom you should also lure to the ground floor.
Return again, take the wristband, and open the conference room door. A whole horde of infected enemies awaits you here, led by a crazed singer.
Try to lure them downstairs one by one, or eliminate them if you have enough ammunition. Warning: The singer occasionally emits loud screams that damage and confuse you if you’re too close. In the far corner of the conference room, you’ll finally find the corrosive in a blue bottle.

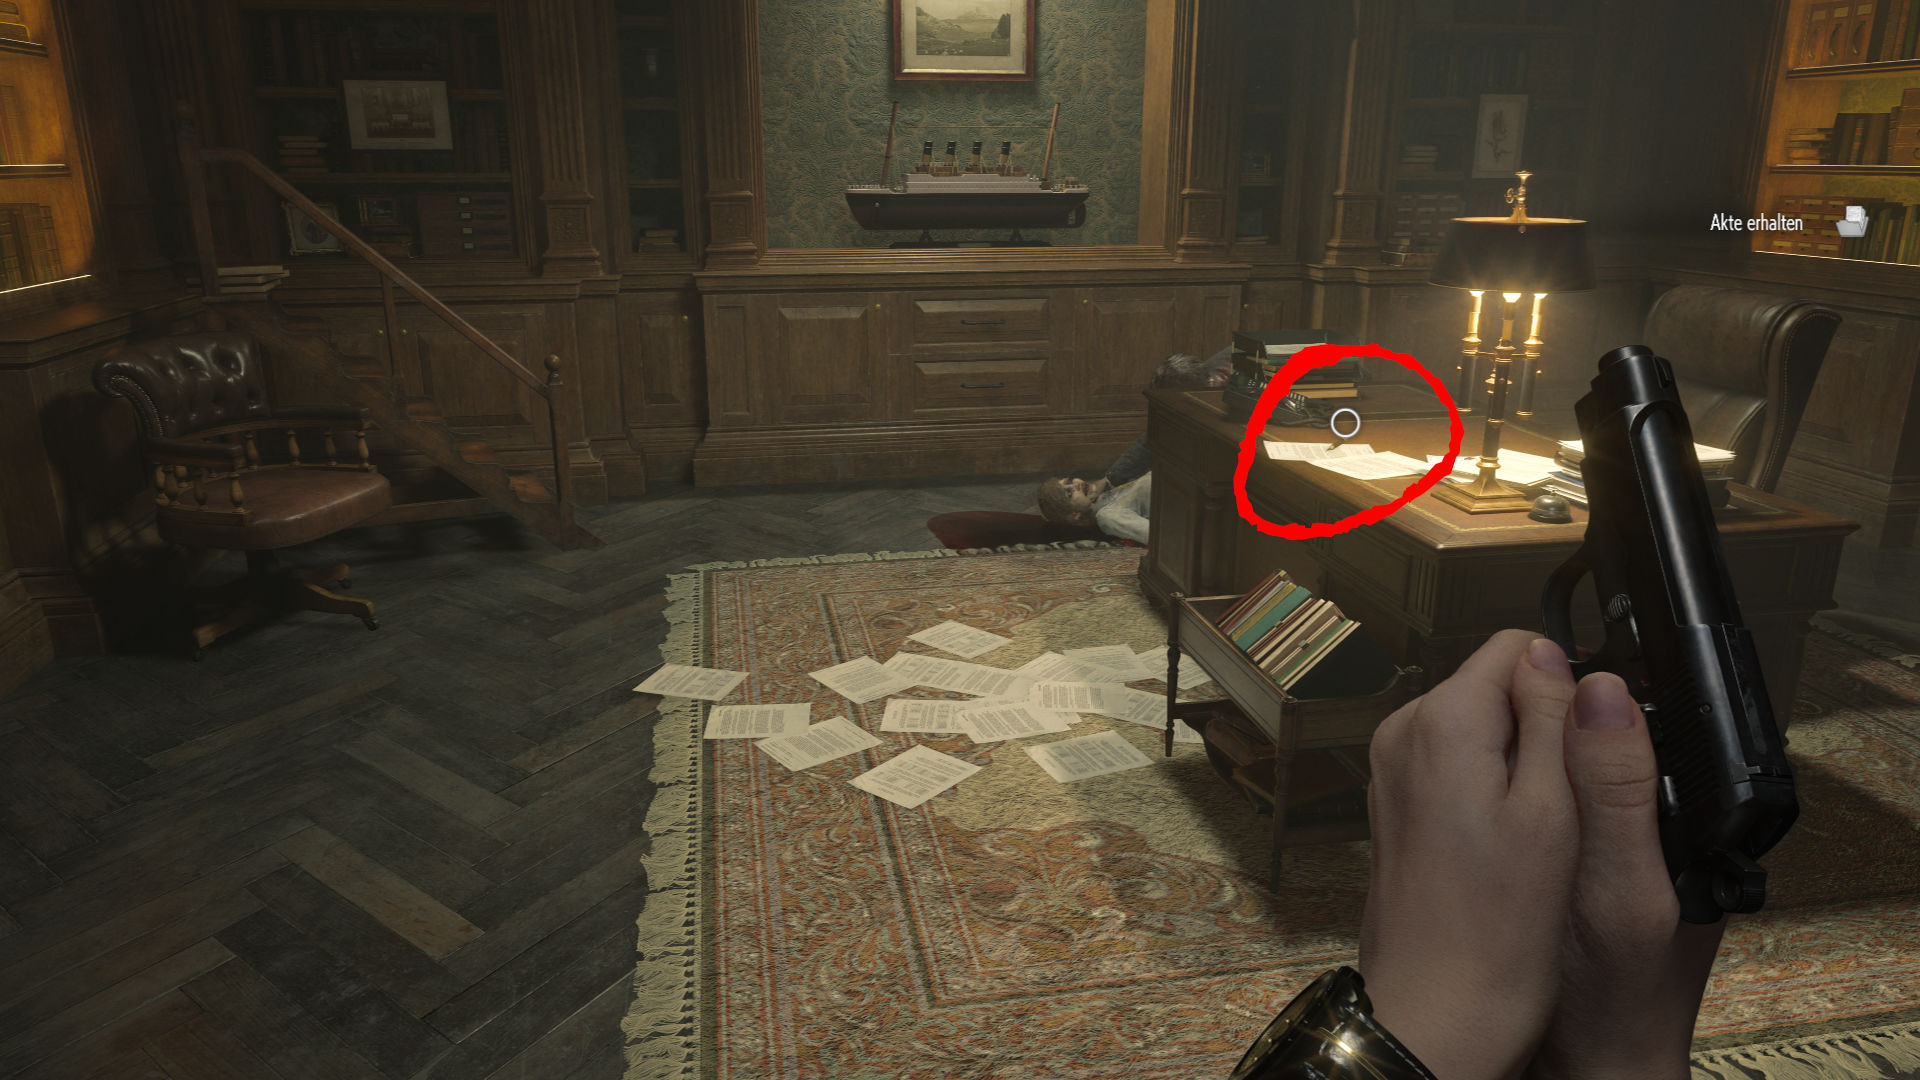
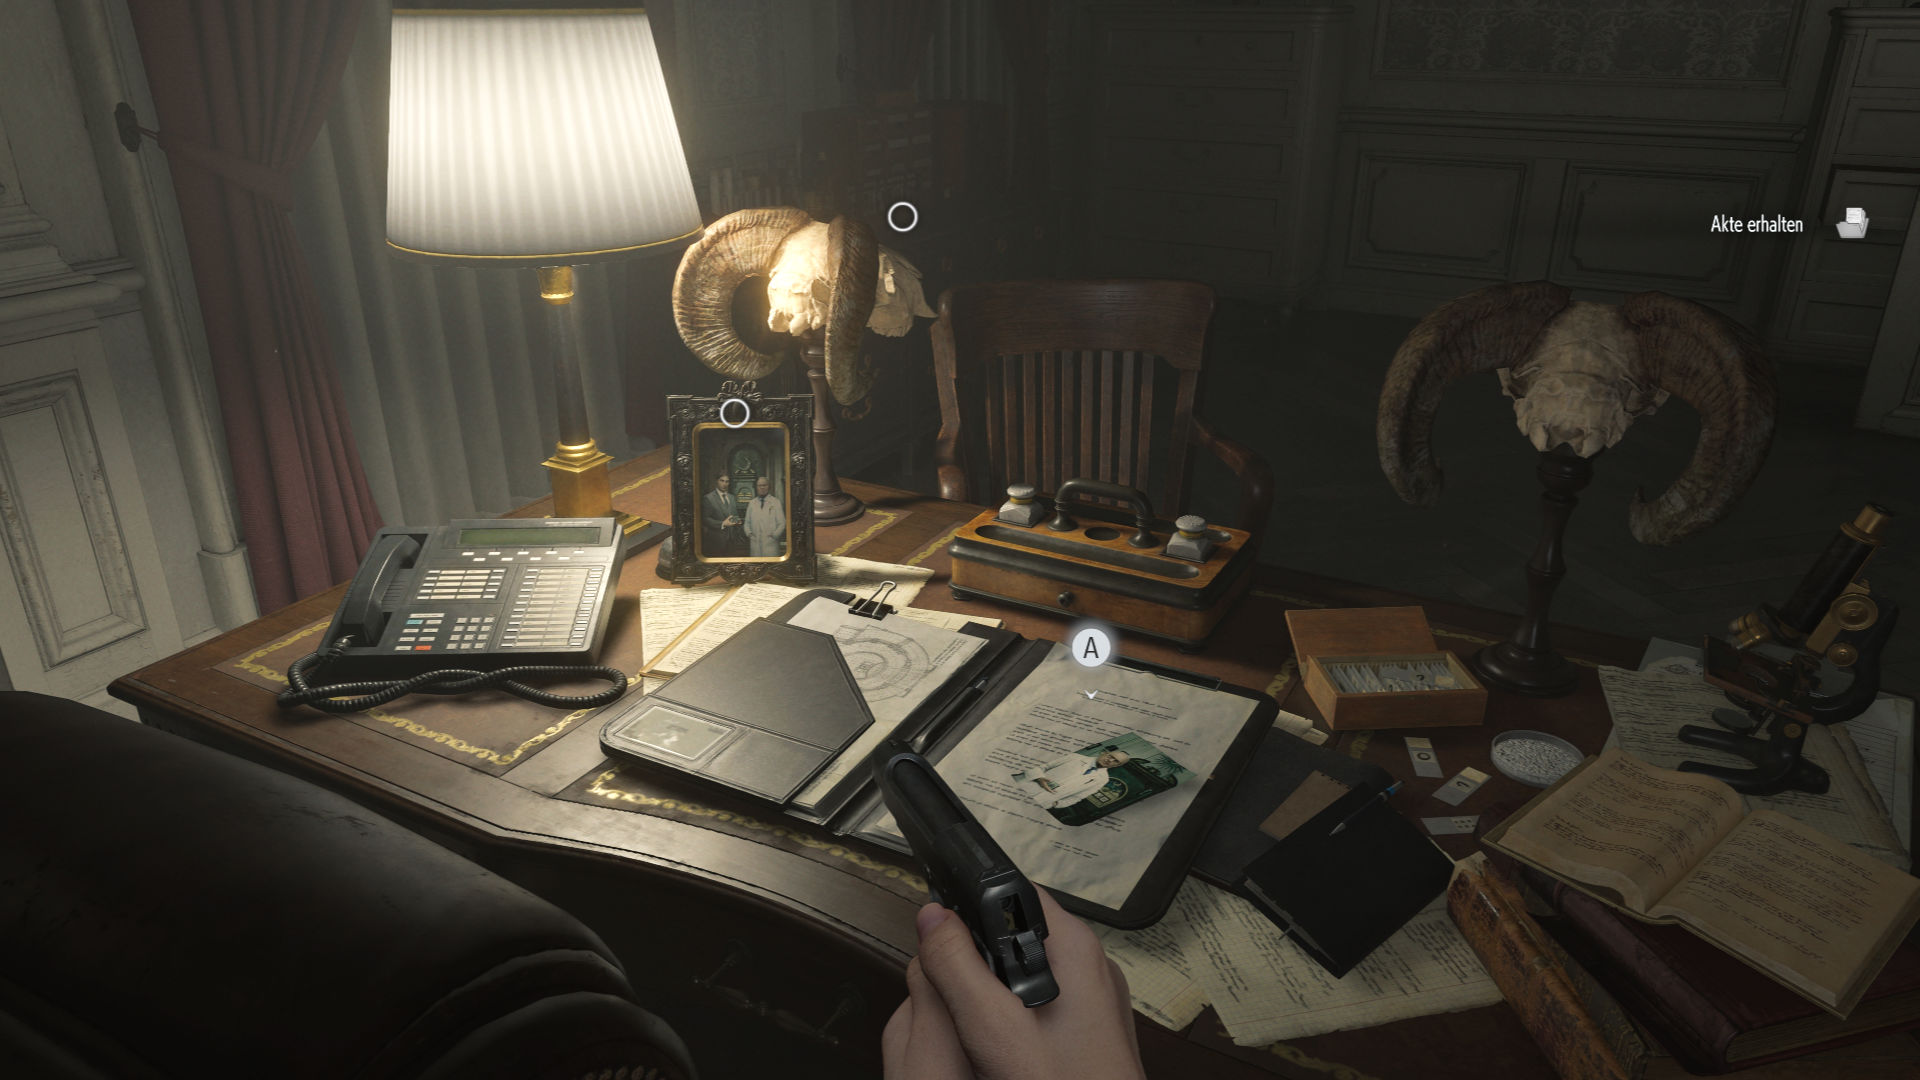
You can now use the corrosive to destroy the lock and open the secret cabinet. All that’s left is the combination. You’ll find it in the photos scattered around the office (desk and sideboard):
- Star, Sun, Moon, Sun
Open the cabinet to receive the “Sun Quartz” and a leather-bound notebook with instructions on how to open an organ transport box.
Open the Secret Cabinet in the Security Manager’s Office
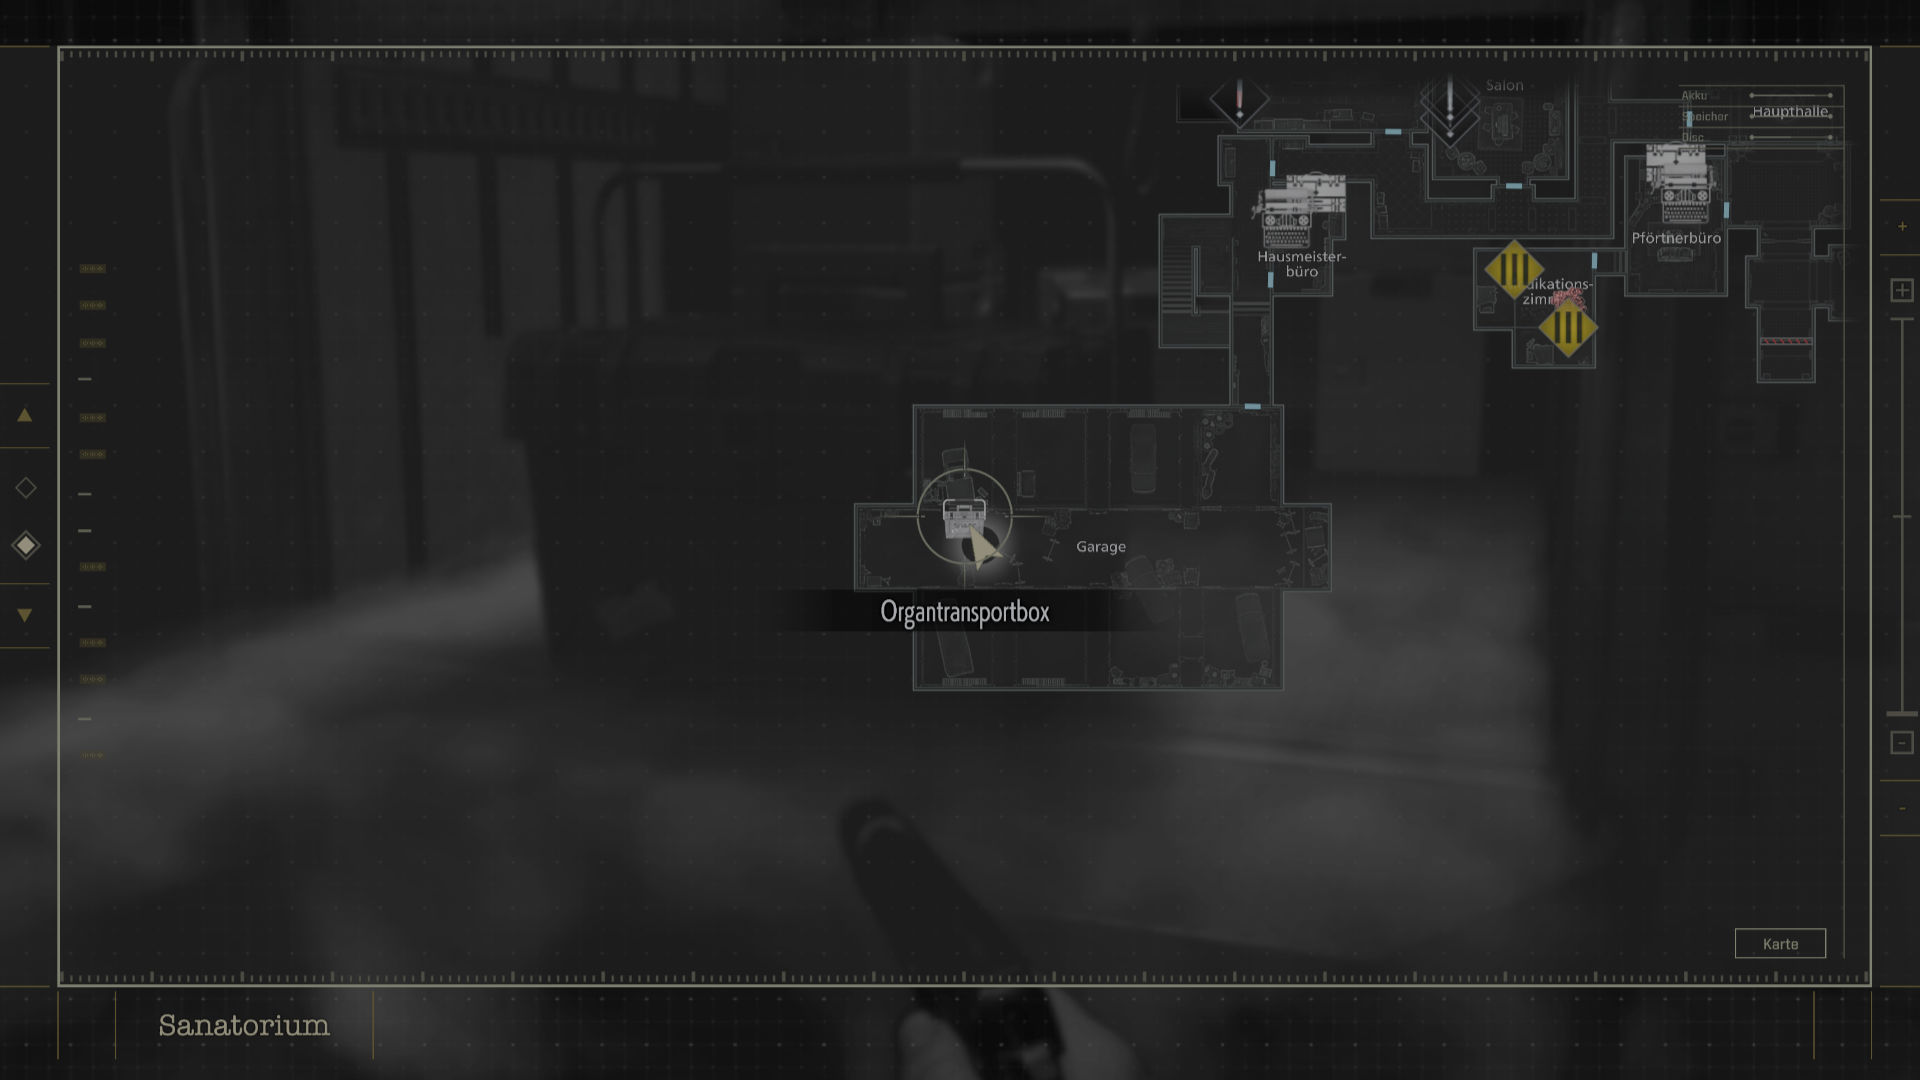
With the ID Wristband Lv.1, you can also open the door in the West Wing at the end of the hallway past the Parlor. There you’ll reach the Janitor’s Office, where you’ll find a wrench on the desk. With it, you can open the door to the Freezer, whose red rotary valve you broke off during an earlier escape sequence. Inside, you’ll find an artificial heart.
Next, head to the Garage and open the transport box according to the instructions from the Lead Researcher’s notebook. You’ll receive an artificial lung.
With both organs in your inventory, go to the East Wing and insert them into the corpse in the examination room. Defeat it afterward to obtain the ID Wristband (Level 2).
This will grant you access to the isolation ward and from there, to the Security Manager’s Office. Take the notebook from the table and examine the secret cabinet.
Grace realizes that she needs the blind girl you found in the dungeon beneath the Guard’s Office to decipher the Braille.
The required ID Wristband (Level 3) to free her from her glass cage is carried by the dead professor at the table. Grab it and retrieve the girl.
Before carrying her to the secret cabinet, you should eliminate the biggest threats, as you cannot fight while holding the girl and are otherwise heavily restricted. Back in the office, you’ll need to fend off a few zombies while the child opens the secret cabinet.
- Continue here: Resident Evil Requiem: Walkthrough for the Care Center Basement (in progress)