
As soon as you arrive in Resident Evil Requiem with Leon in Raccoon City, you need to find your first component right away. We’ll show you how to get the Distributor for the detonator.
In Resident Evil Requiem, after breaking through at Ridgewood Station, you reach a new area of the destroyed city. In front of you is a prepared explosive charge that can be used to breach the quarantine wall leading to central Raccoon City. The problem is that the detonator is incomplete. To finish it, you need to find several components scattered throughout the surrounding area. In this guide, we’ll walk you through step by step how to activate the Central Camp, survive the warehouse encounter, and ultimately find the Distributor for the detonator.
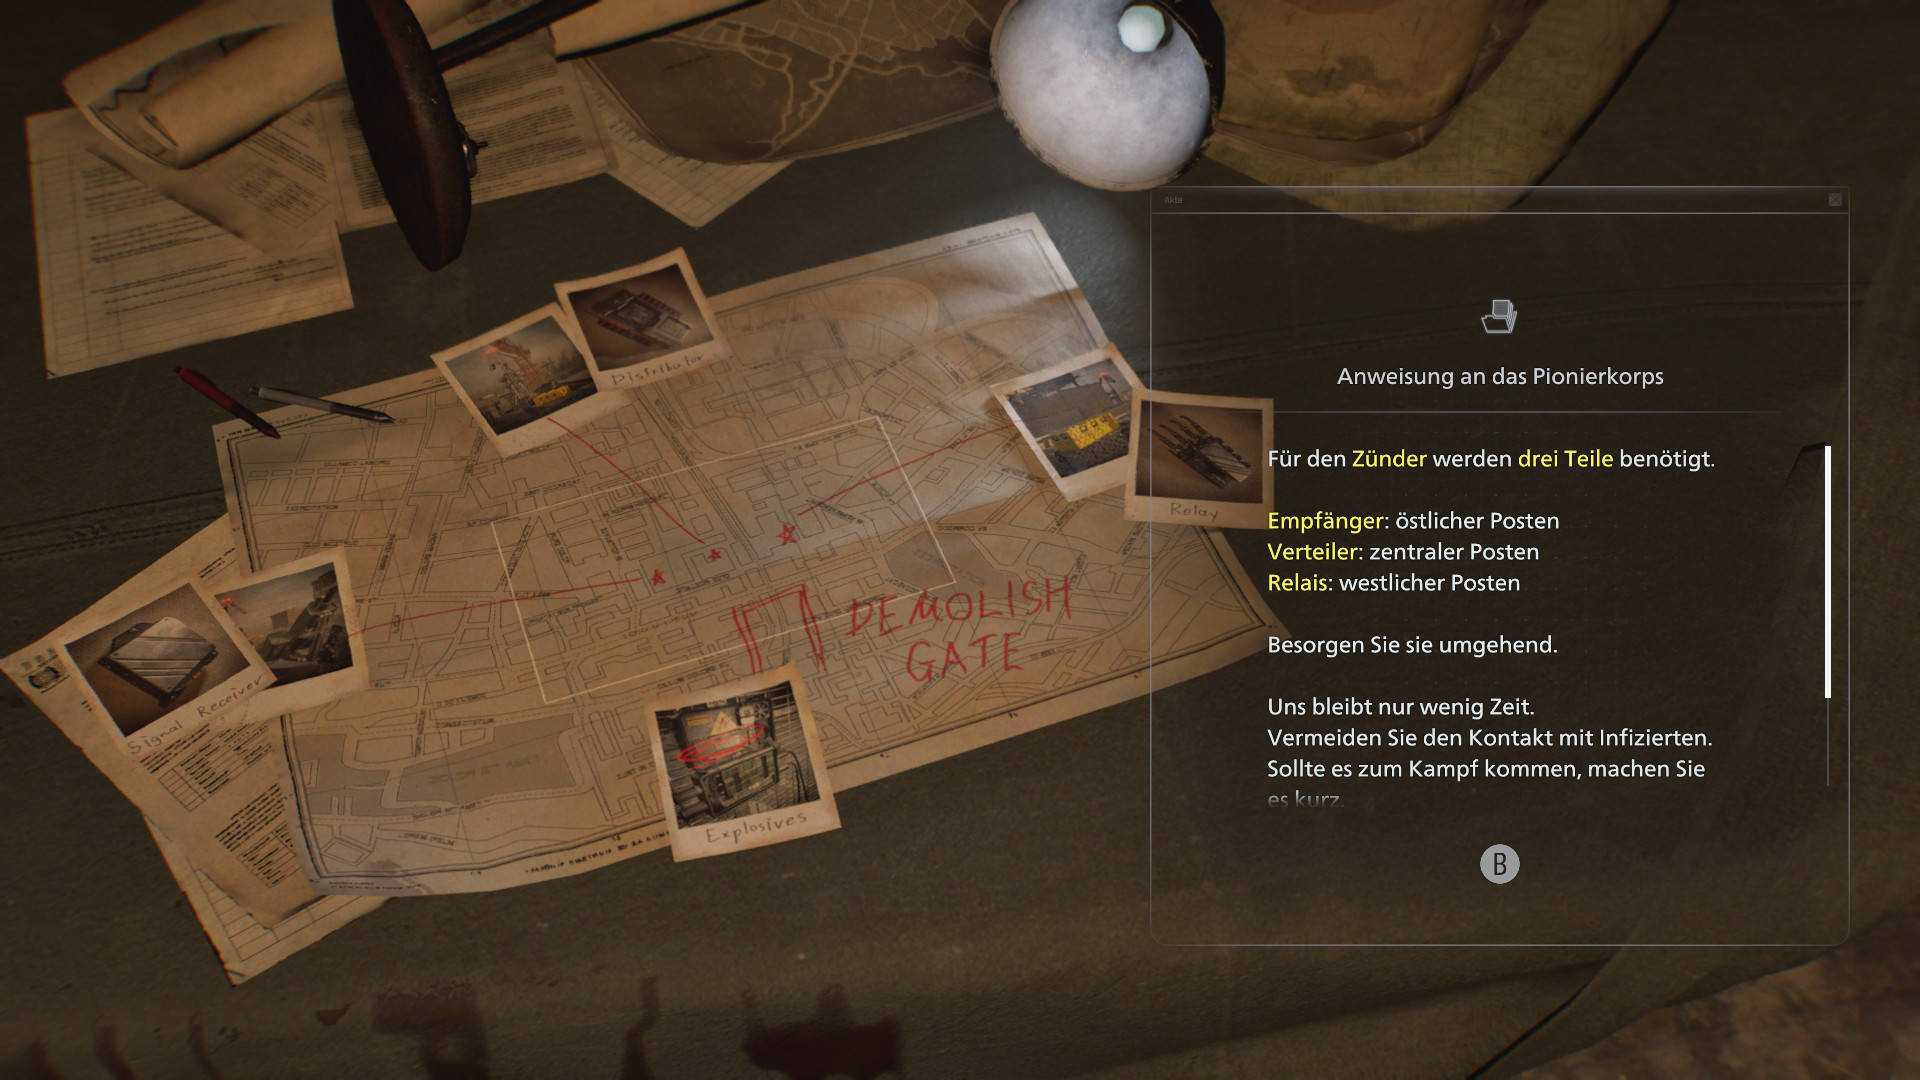
Objective: Three detonator parts
In the mission area, you quickly realize that someone has already tried to prepare the explosive charge. However, the work was never completed. Clues in the Central Camp reveal that three components are missing.
You need to find these three parts:
- Signal Receiver in the eastern area
- Distributor at the central position
- Relay in the western area
The Distributor is located above the Central Camp. That’s why your first route leads through the adjacent Logistics Warehouse.
Search the area for ammo and resources
Before entering the area, it’s worth checking your surroundings. Right next to the bus at the cliff, you’ll find a vehicle with rifle ammo in the trunk. A bit further ahead, there’s a rusty delivery van with handgun ammo on the driver’s seat. You’ll also find additional vehicles nearby that you can loot.
Activate the Central Camp
You can recognize the makeshift camp by a large blue tent and several containers. Go behind the tent and activate the generator. This restores power and triggers a short scene. Inside the tent, you’ll find important clues, including a document confirming that three detonator parts are scattered across the area.
Next to the laptop, you’ll also find the Tactical Tracker. This device records combat data and rewards you with credits for defeated enemies. You can use these credits at supply crates to get ammo, equipment, or upgrades. The laptop also serves as a save point, so make sure to use it before moving on.
Open access to the Logistics Warehouse
Leave the tent through the back. There you’ll find a large locked garage door. Press the red switch next to it and crouch to enter the warehouse. In the first room on the left, you’ll find lockers and a metal case containing a hand grenade. Then continue into the large storage area.

Survive the zombie attack in the warehouse
As you move deeper into the warehouse, zombies will emerge from the ground and attack in groups. Try not to stay in the middle. Instead, move along the edges to control the fight and take down enemies one by one from a safer distance.

Standing between the shelves can quickly get you surrounded. Watch out for enemies on elevated platforms, as some will attack from range or throw objects. Grenades are very effective against groups, but keep enough distance to avoid damage. After the fight, search the warehouse thoroughly for ammo crates.
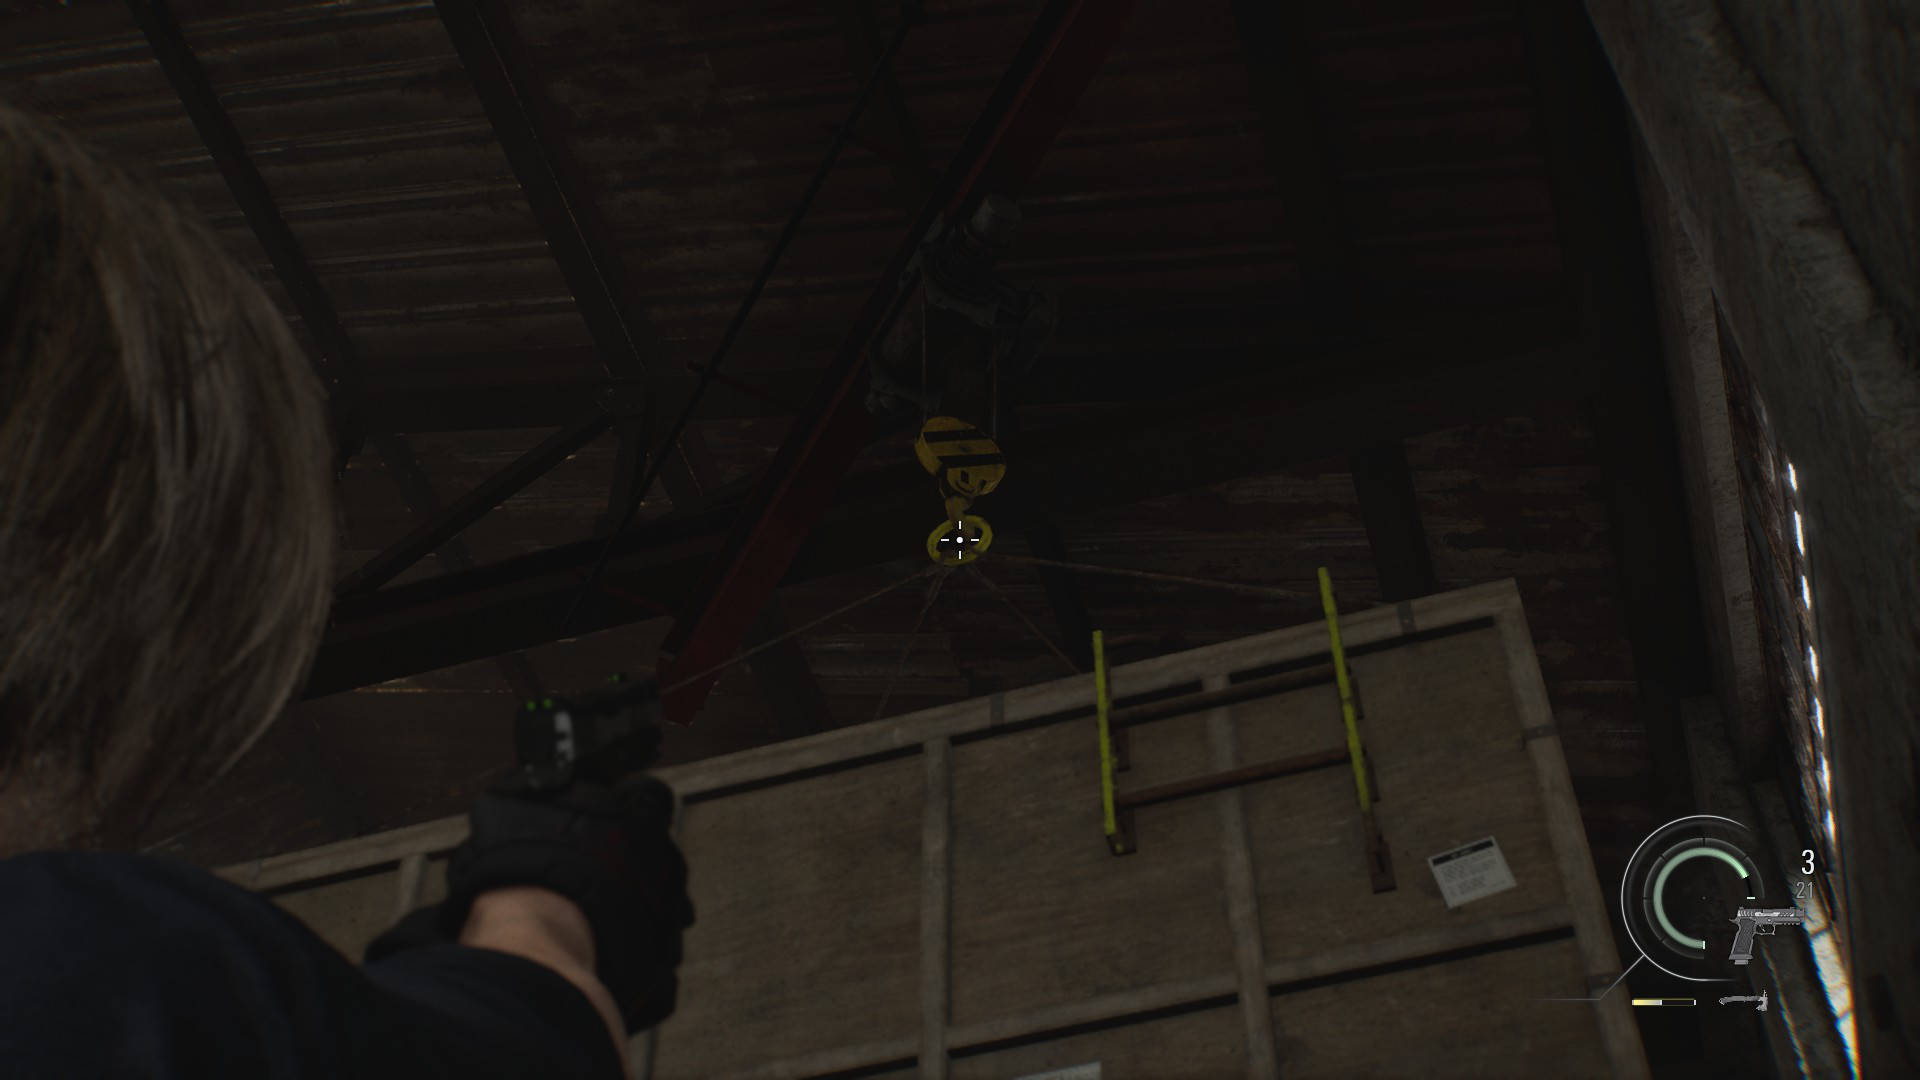
Shoot down crates and create paths
To progress, you need to use the environment. Several crates are hanging from cranes above you. Shoot their supports to drop them and create new paths. Use ladders and these routes to climb higher step by step. More zombies will appear on the upper levels.
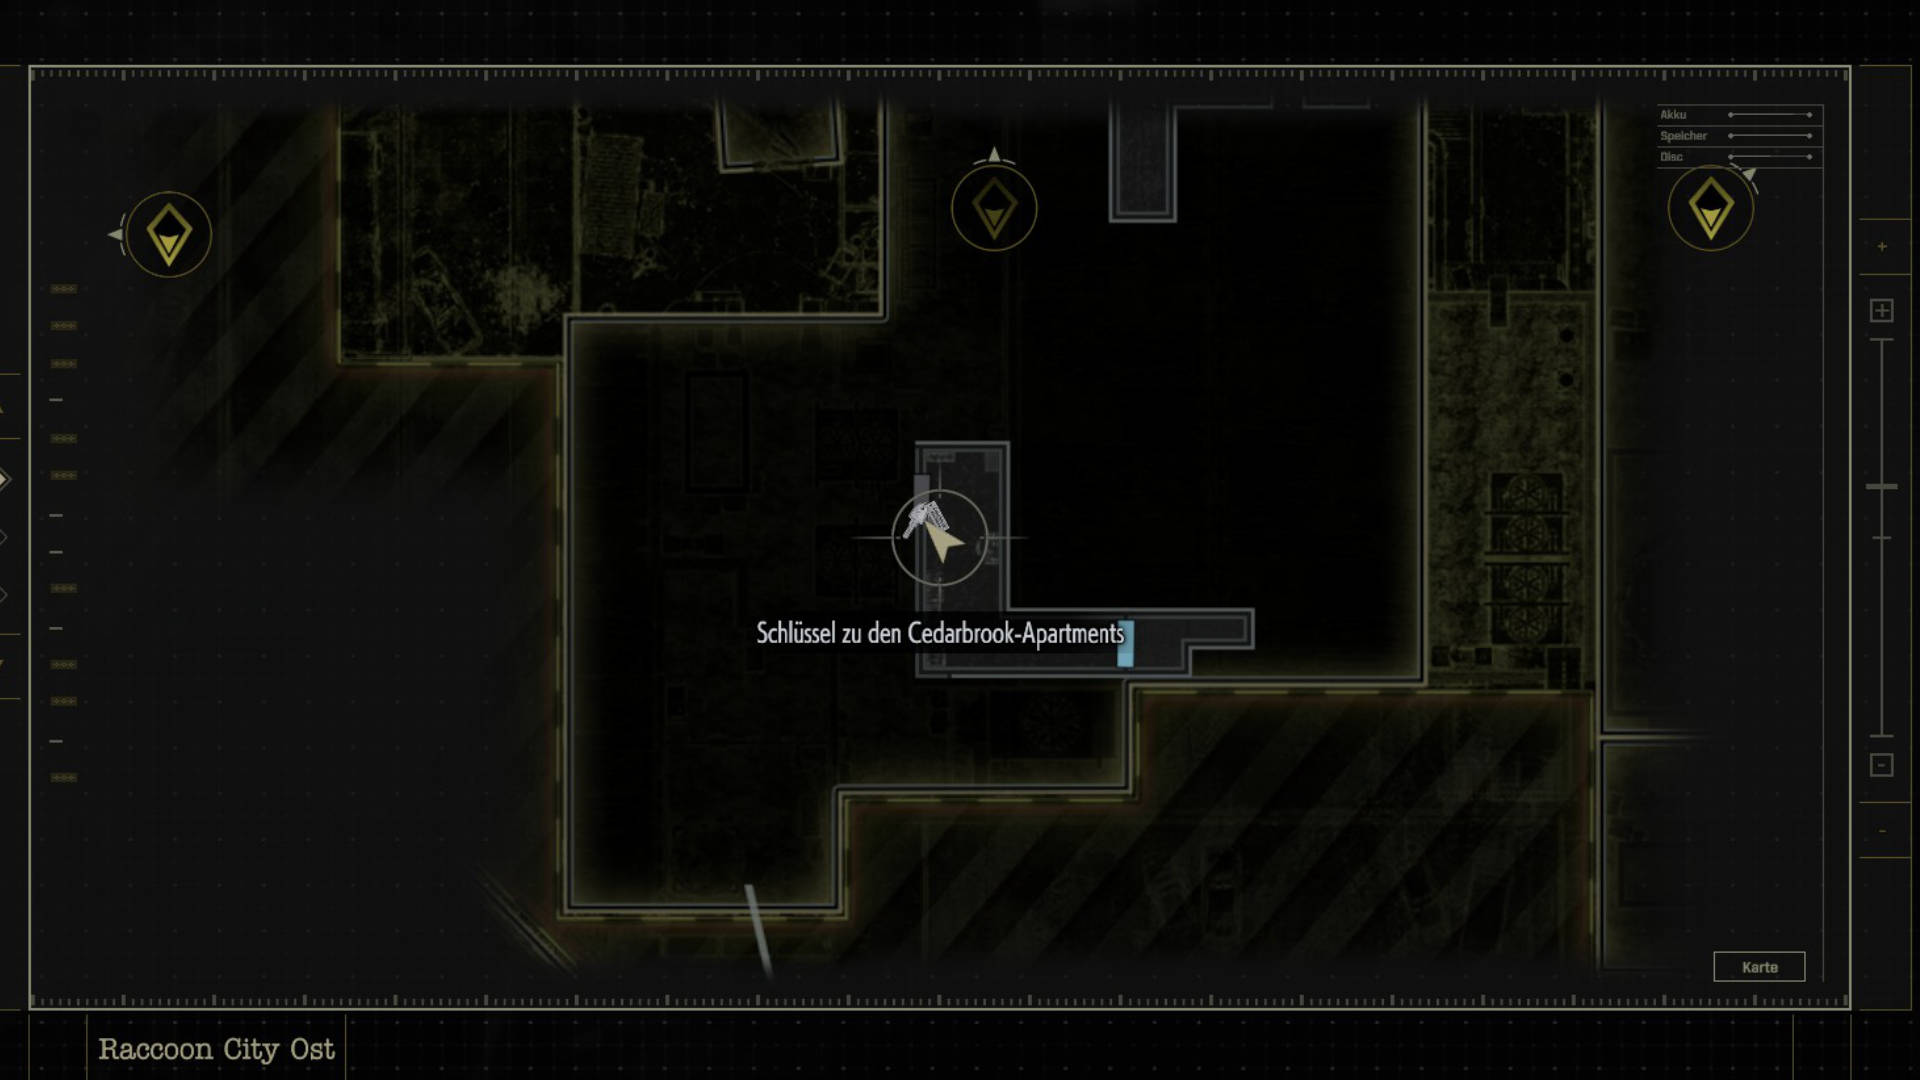
Cedarbrook Apartments Key
Follow the platforms along the outer wall. At the end, you’ll find a narrow corridor. Just before the door, the Cedarbrook Apartments Key is hanging on the wall. Make sure to pick it up, as you’ll need it later.
Climb to the warehouse roof
Exit through the next door. A ladder on the right leads to another rooftop. You’ll find a generator and a zipline gate here, but you need fuel first, so you’ll return later. Continue through the adjacent rooms and climb another ladder.
Find the Distributor on the roof
This ladder leads you to the roof of the Logistics Warehouse. Look for a large yellow toolbox at the northern end. Inside, you’ll find the Distributor, one of the three required detonator parts.


With this, you’ve secured the first detonator part and are one step closer to completing the explosive charge. Next, you’ll search for the remaining components across East Raccoon City.